Remote Application⚓︎
Note:JumpServer Community edition supports remote application with Website only.
1 Function Description⚓︎
- The RemoteApp functionality, released by Microsoft after Windows Server 2008, is an integrated service feature within the system. It enables users to access remote desktops and applications from client, allowing them to use various desktops and applications published remotely without needing to install the operating system and applications on their local client machine.
2 RemoteAPP machine⚓︎
- RemoteApp need to configure an host for remote application.
- The RemoteAPP server is the primary entity responsible for running web page assets or executing programs such as Navicat for connecting to Database remotely.
2.1 Edition Requirement⚓︎
- The Remote Application Srver is a Windows Server,Windows edition requirement is as follows:
| Windows Server 2016 | Windows Server 2019 |
|---|---|
2.2 RemoteApp Server Creation⚓︎
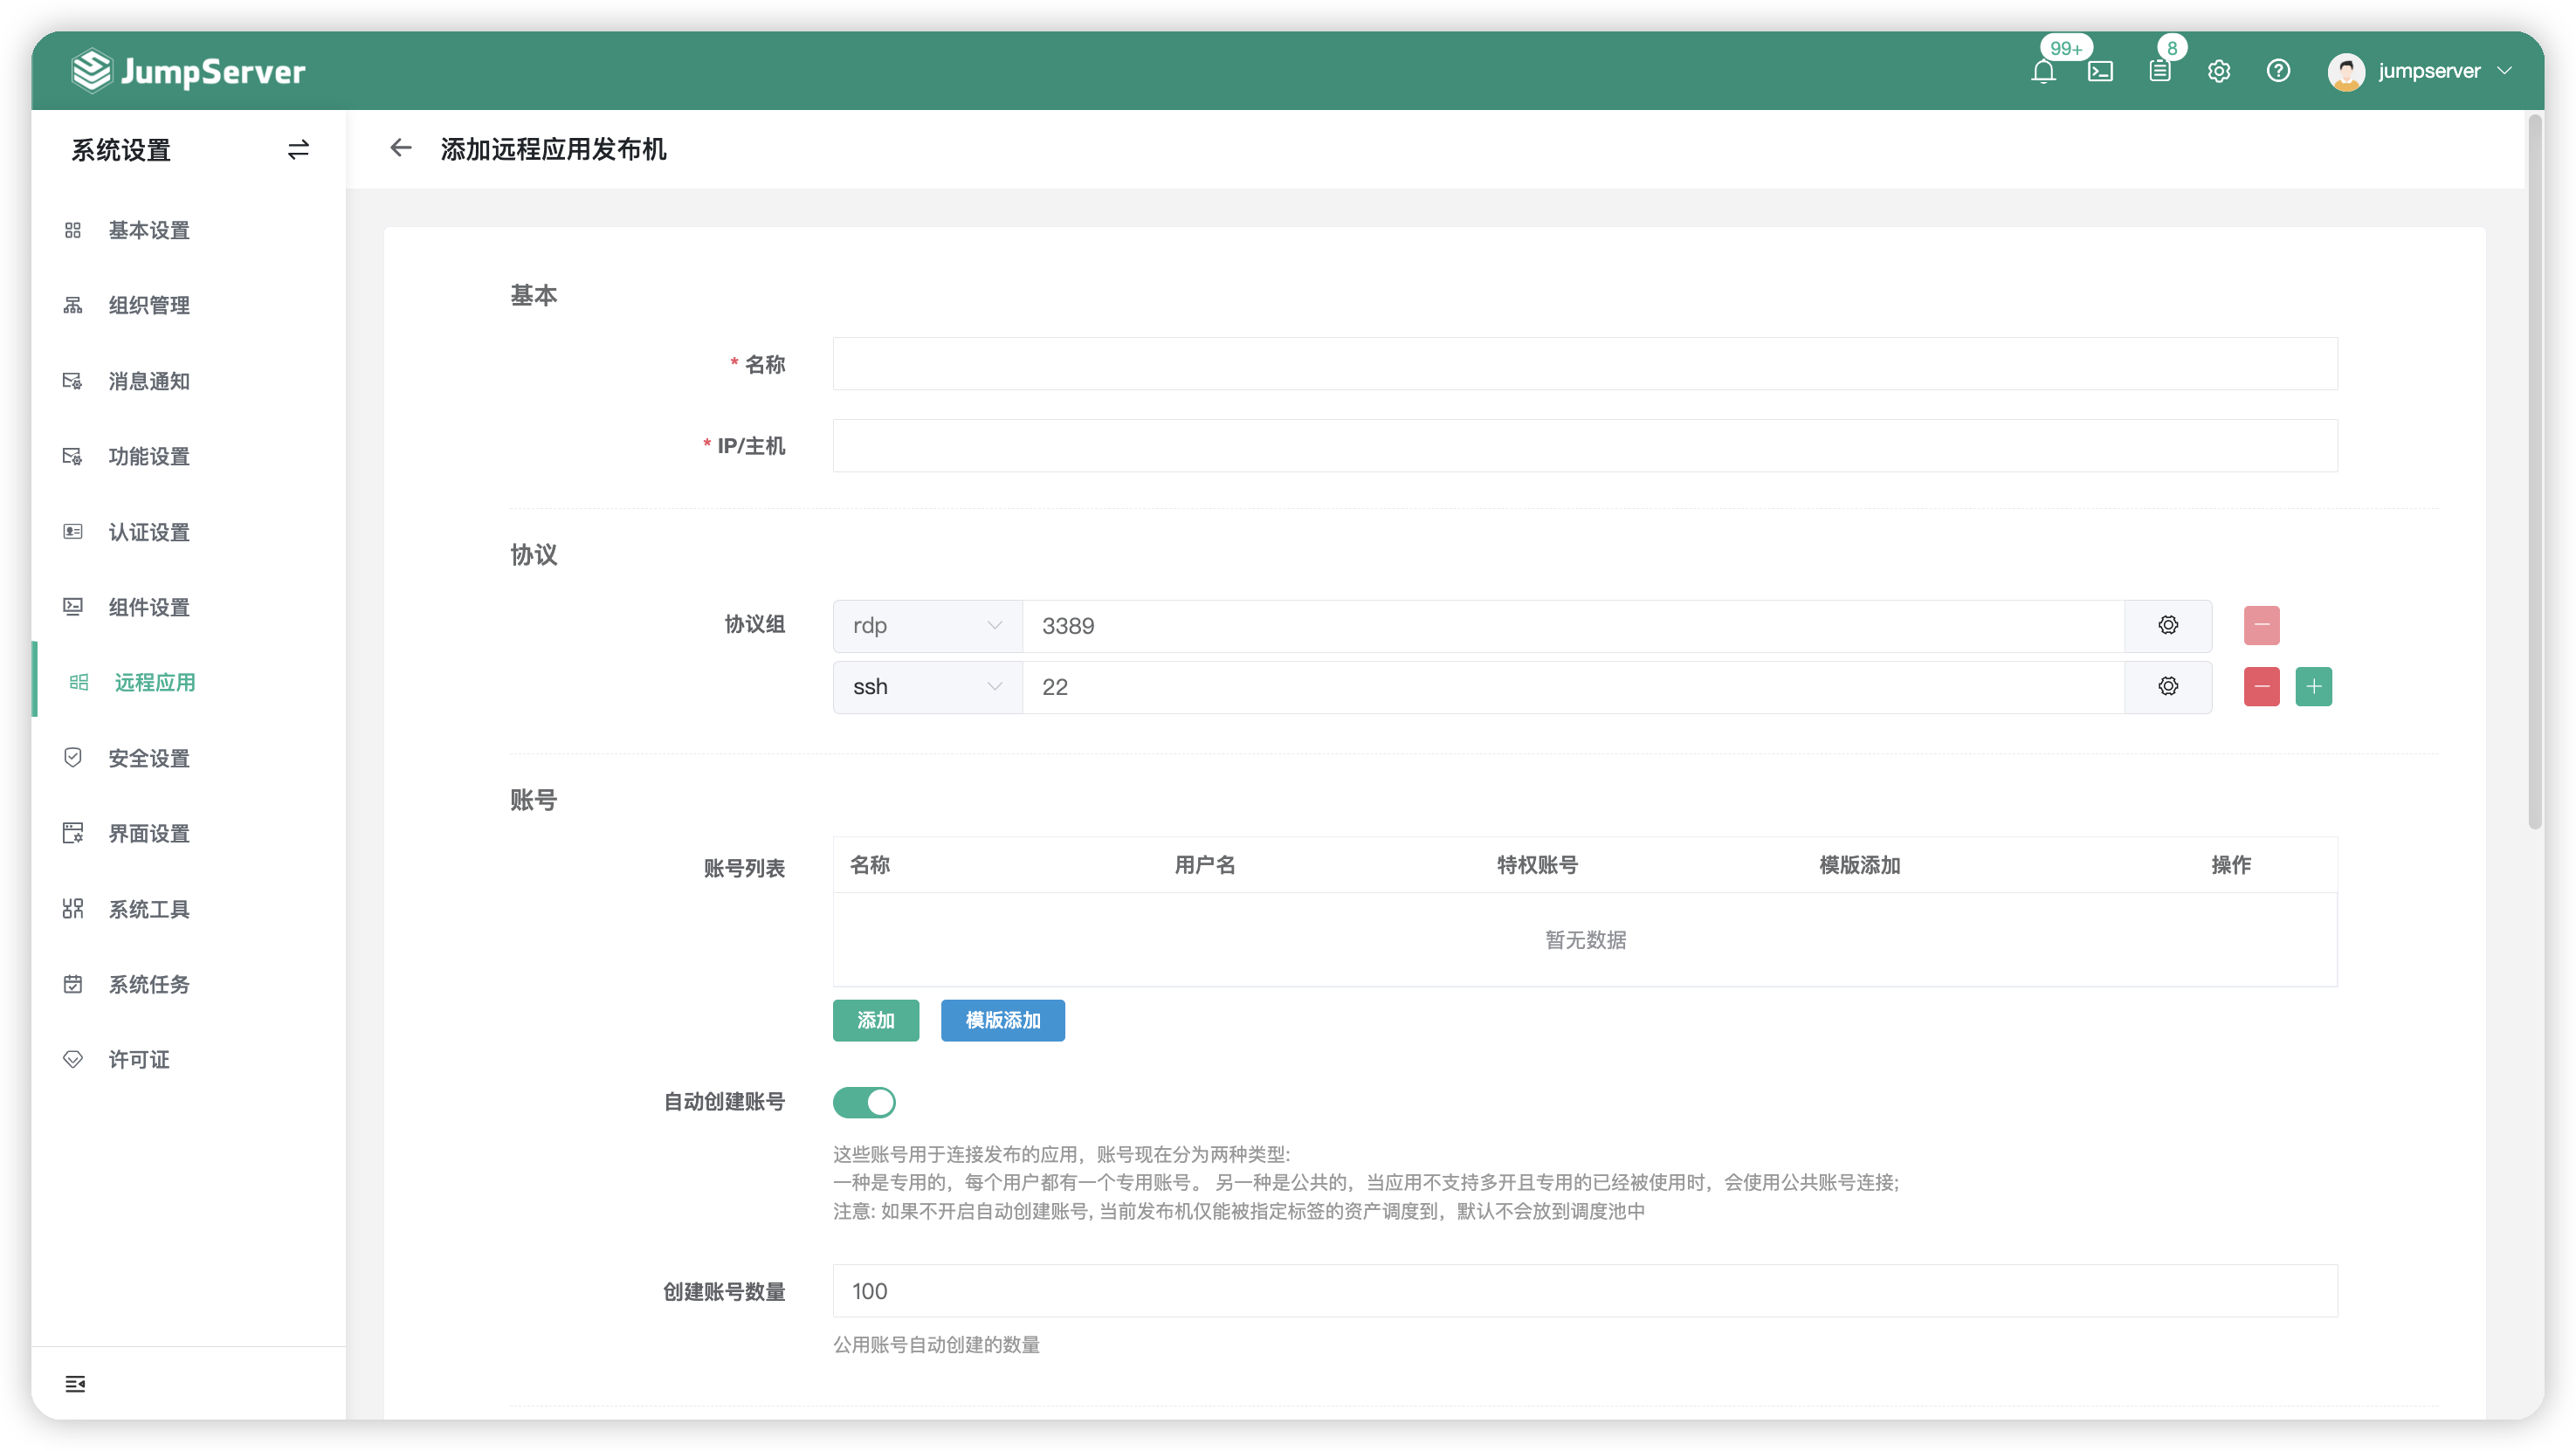
- Clicking on
Createat page of RemoteAPP server then create a new Remote Application Server.
- We support deploying the application deployment server using the WinRM and OpenSSH protocols (it's recommended to use the WinRM service included with Windows Server).
- If you deploy the RemoteAPP server with WinRM protocol, it need to add the WinRM protocol on the page of create remoteapp server page.
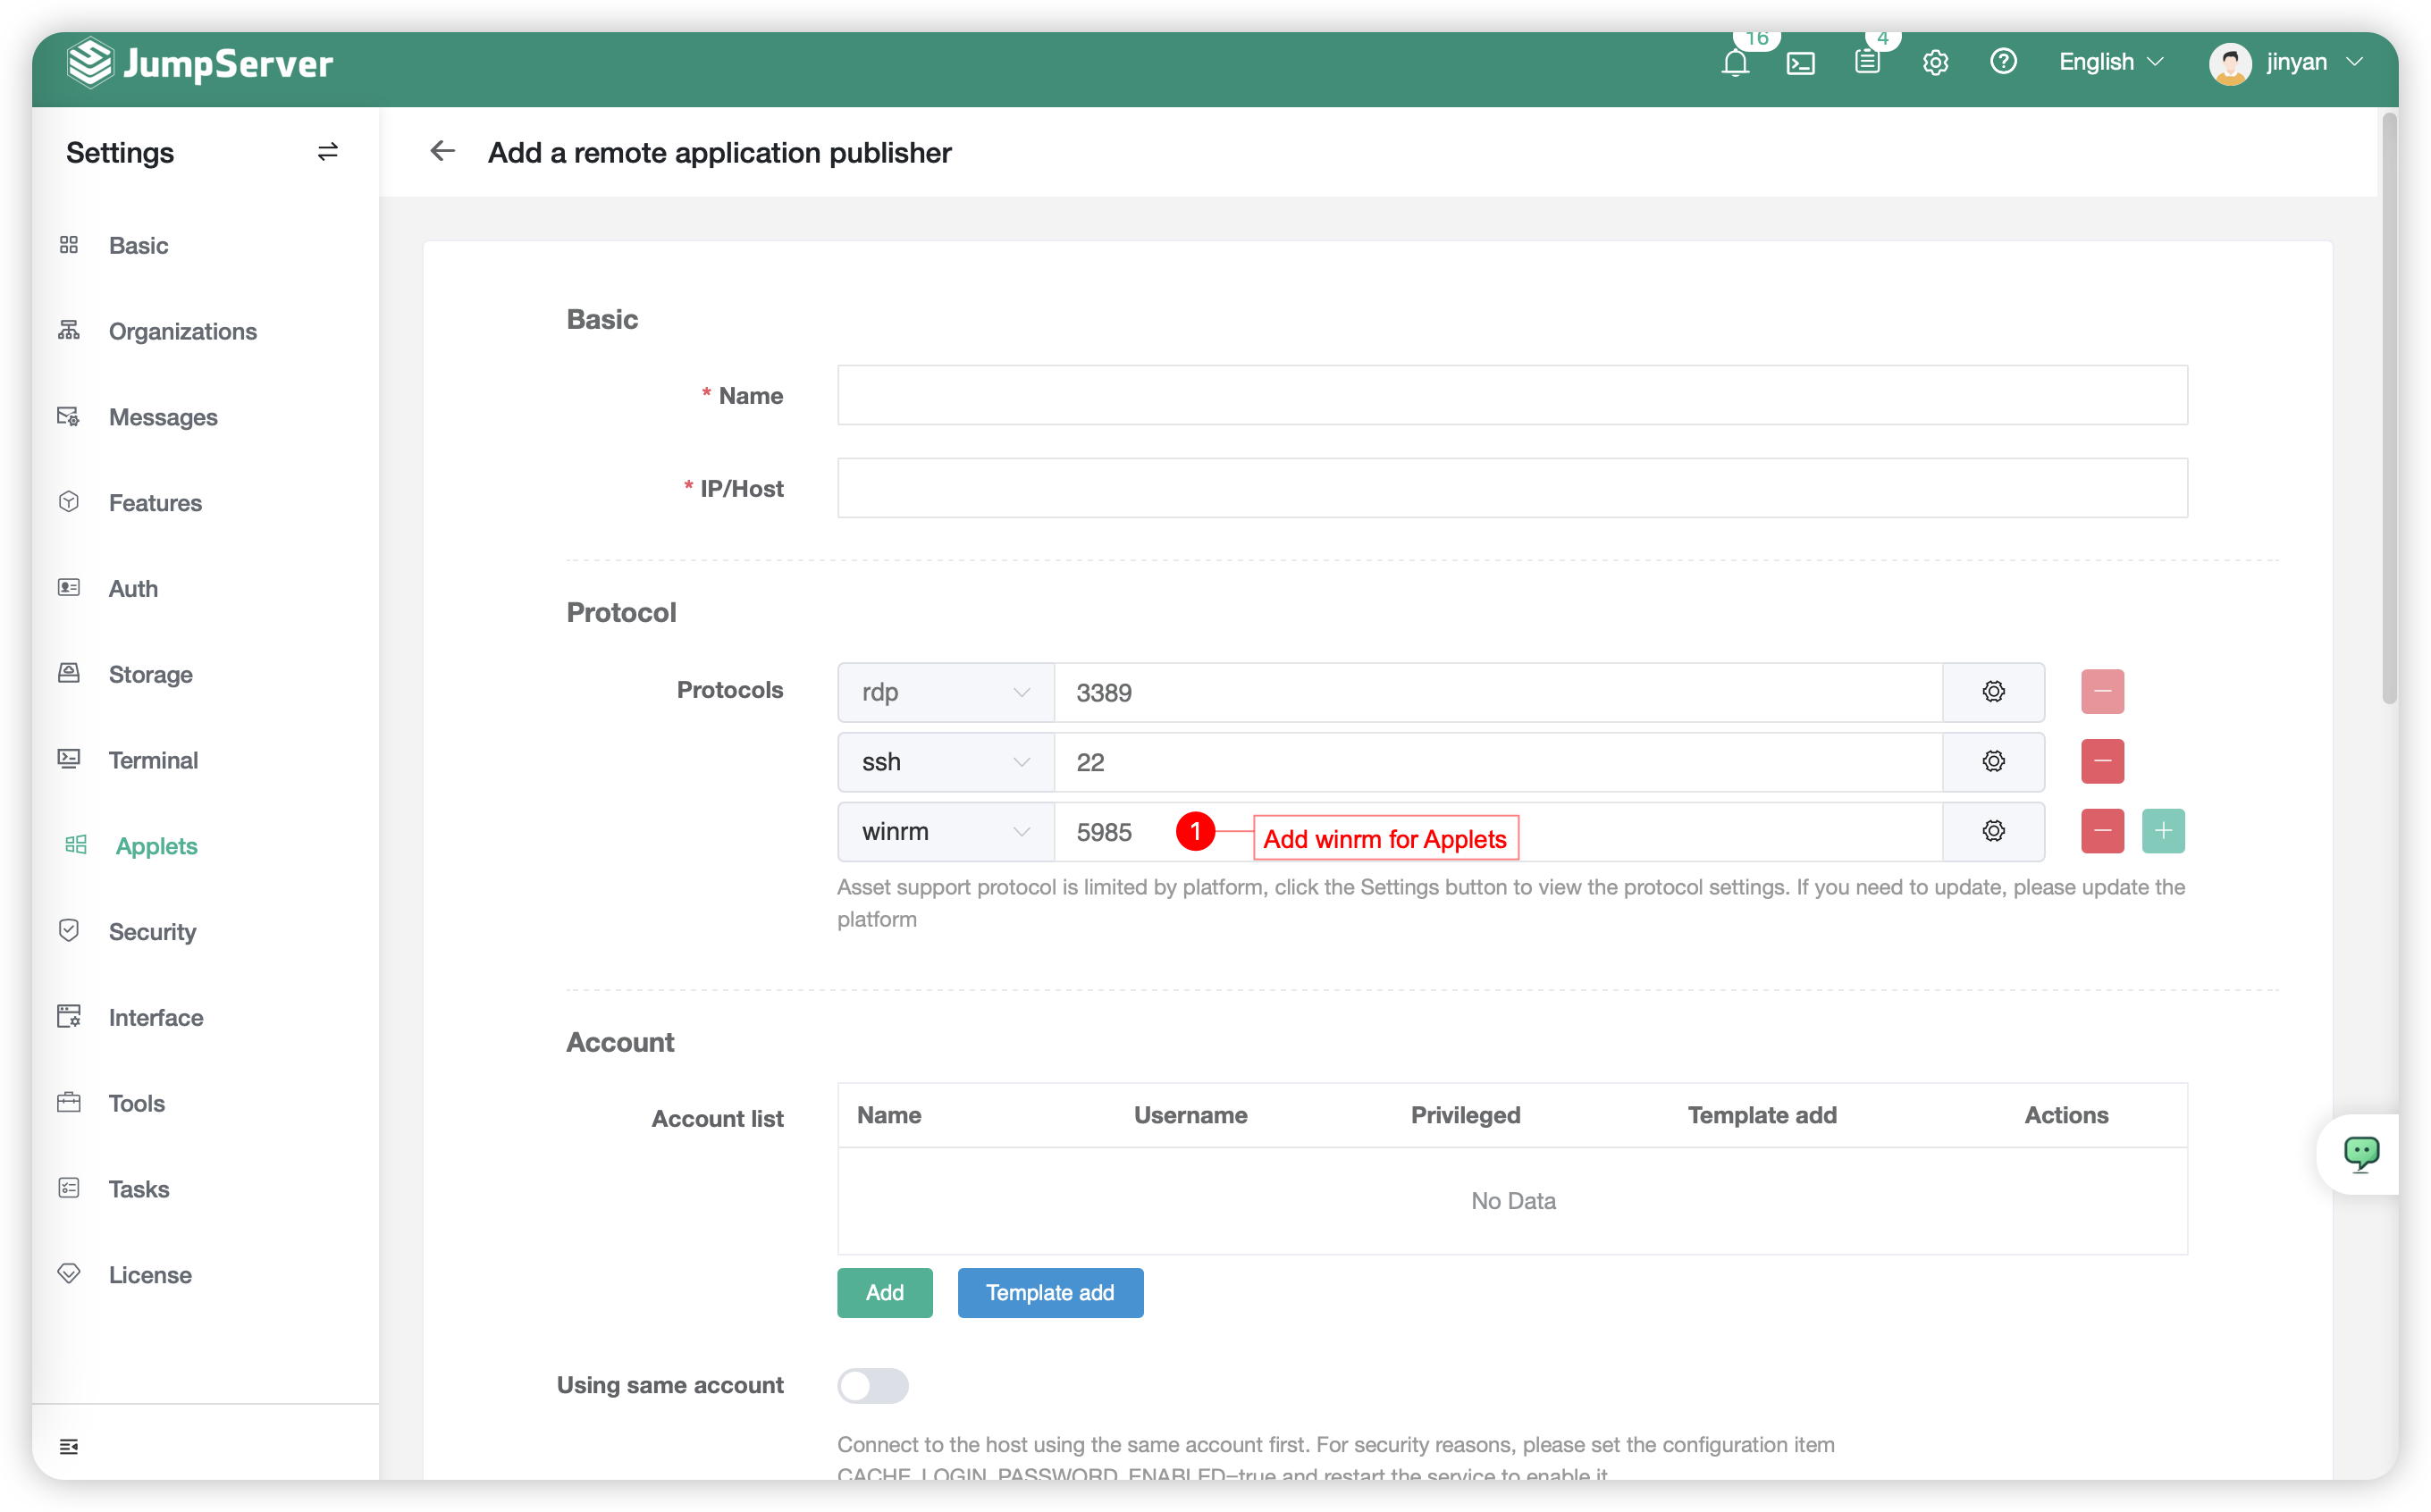
- WinRM configure successfully.
- To deploy the application deployment server using the OpenSSH protocol, you need to install the OpenSSH protocol. You can find the OpenSSH installation package on the JumpServer page by navigating to
Web Terminal-Help-Download.
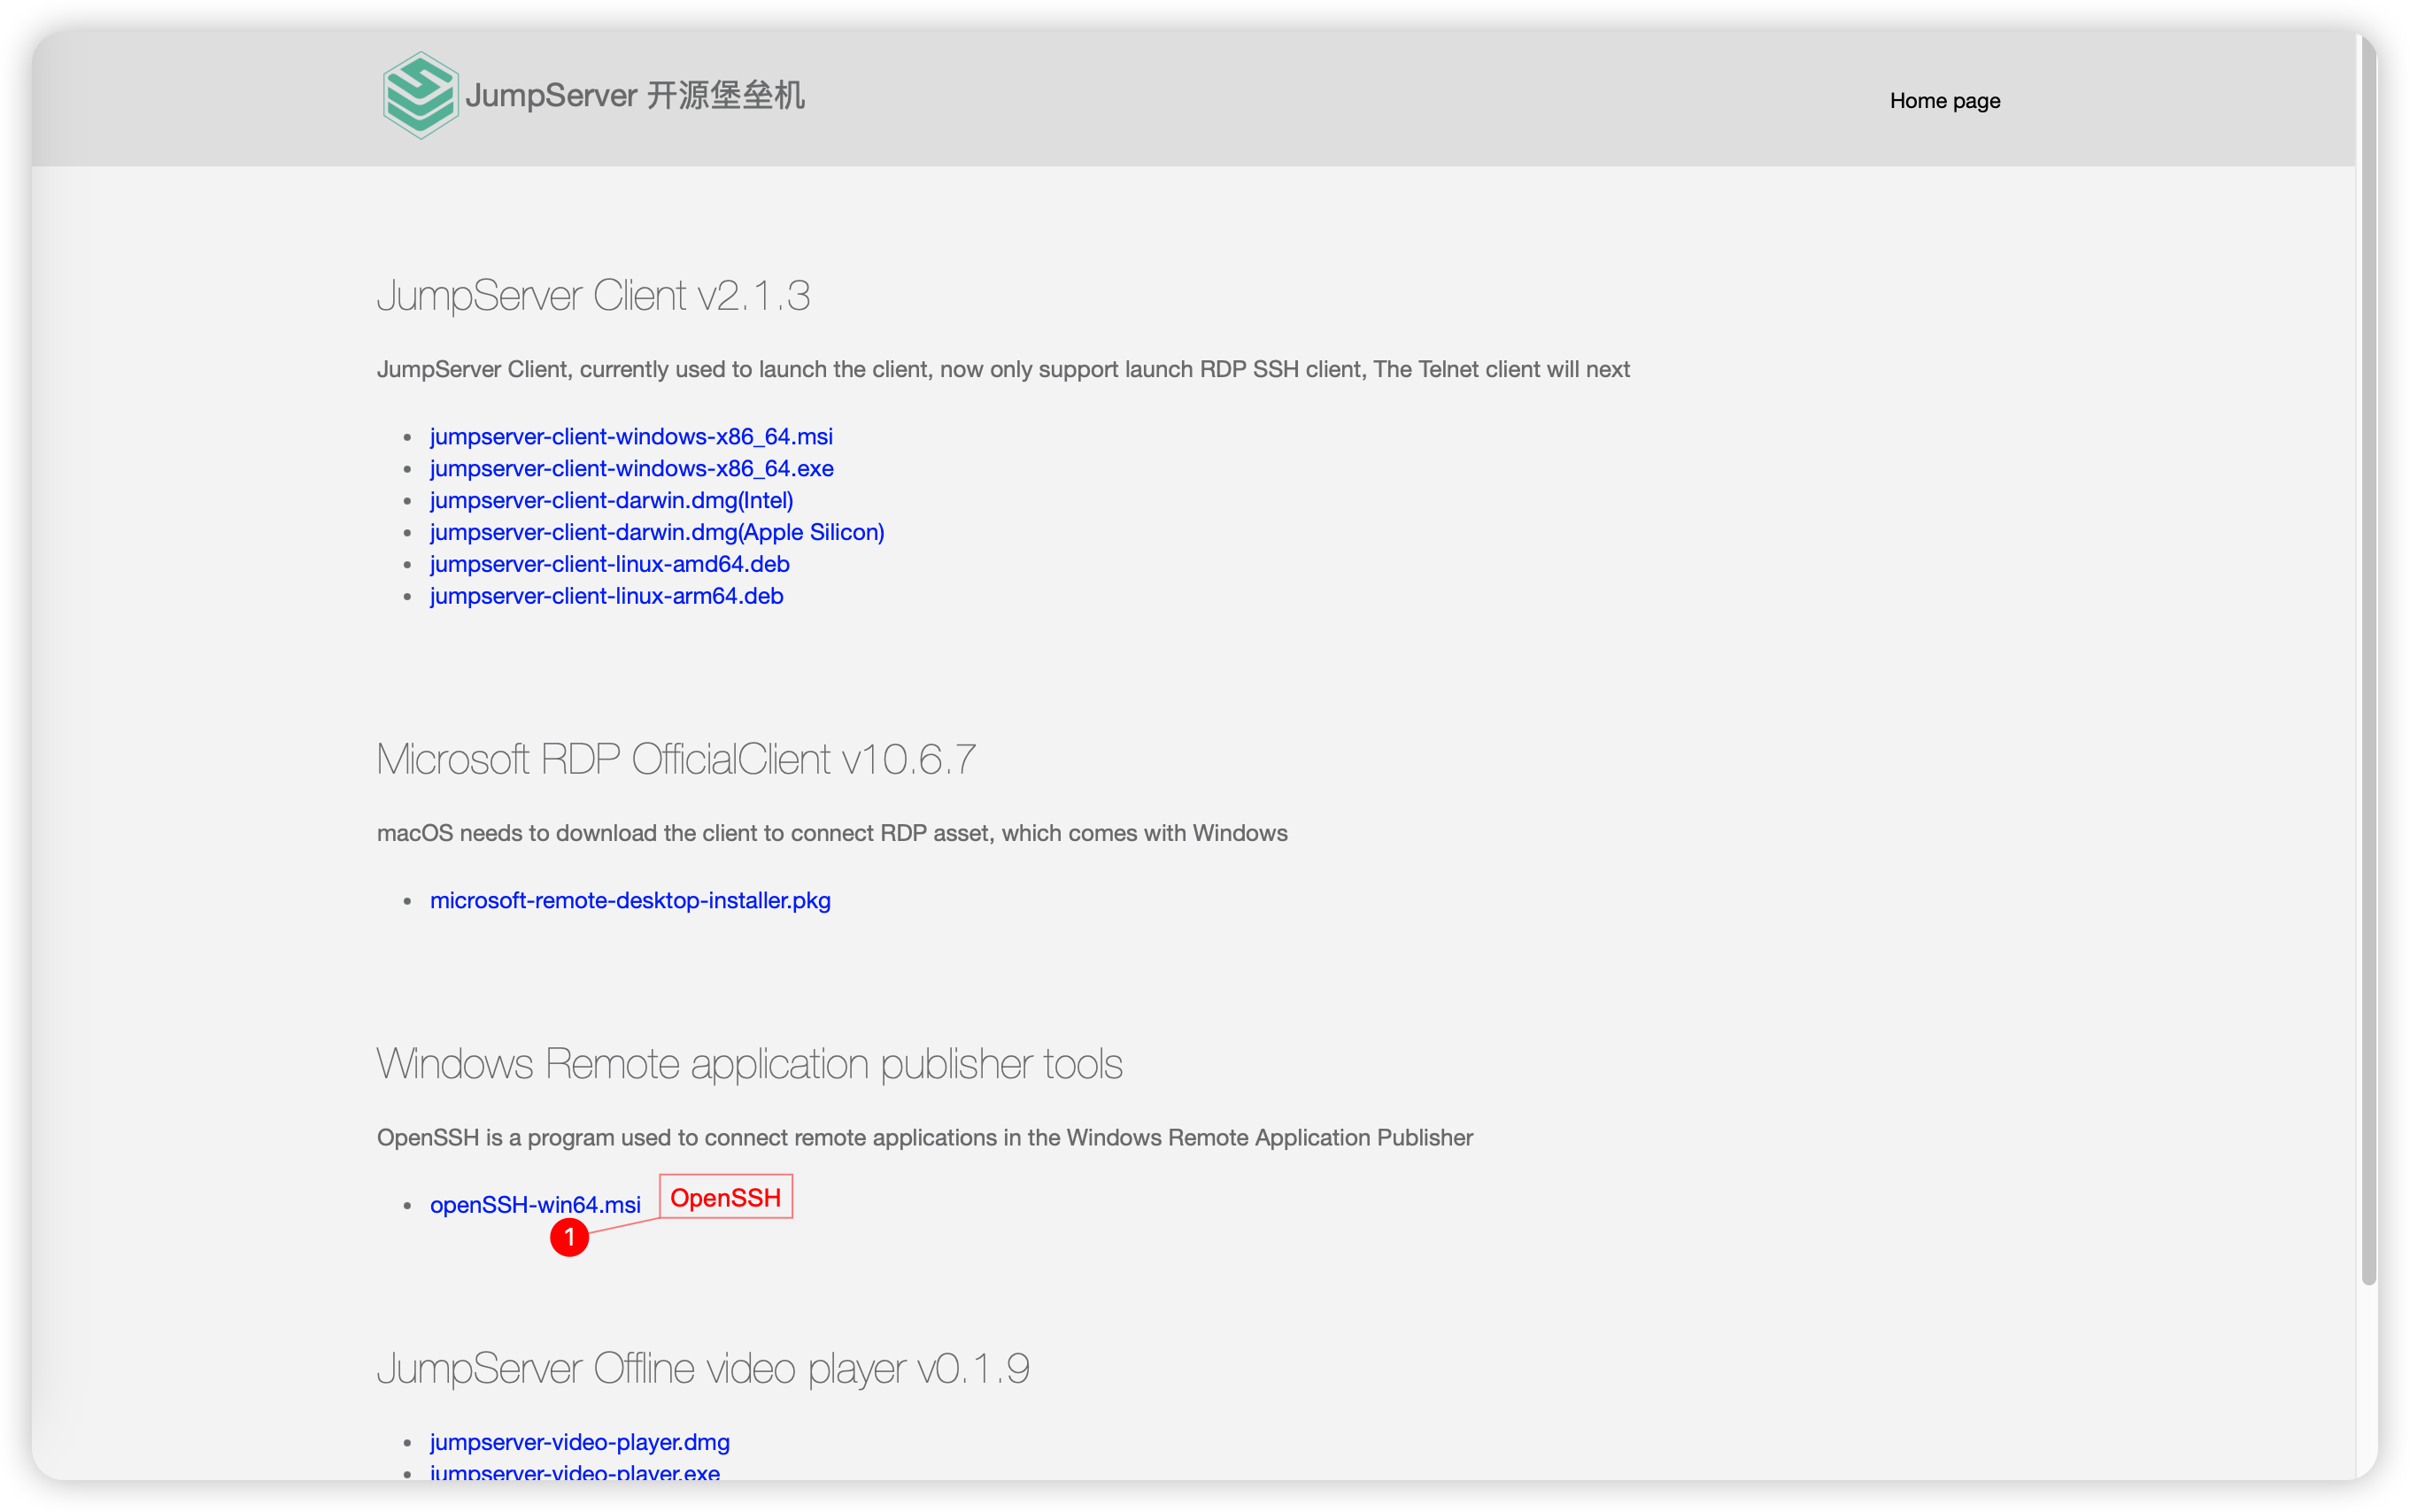
- After uploading the OpenSSH installation package to the RemoteAPP server, double-click on it to start the installation process.
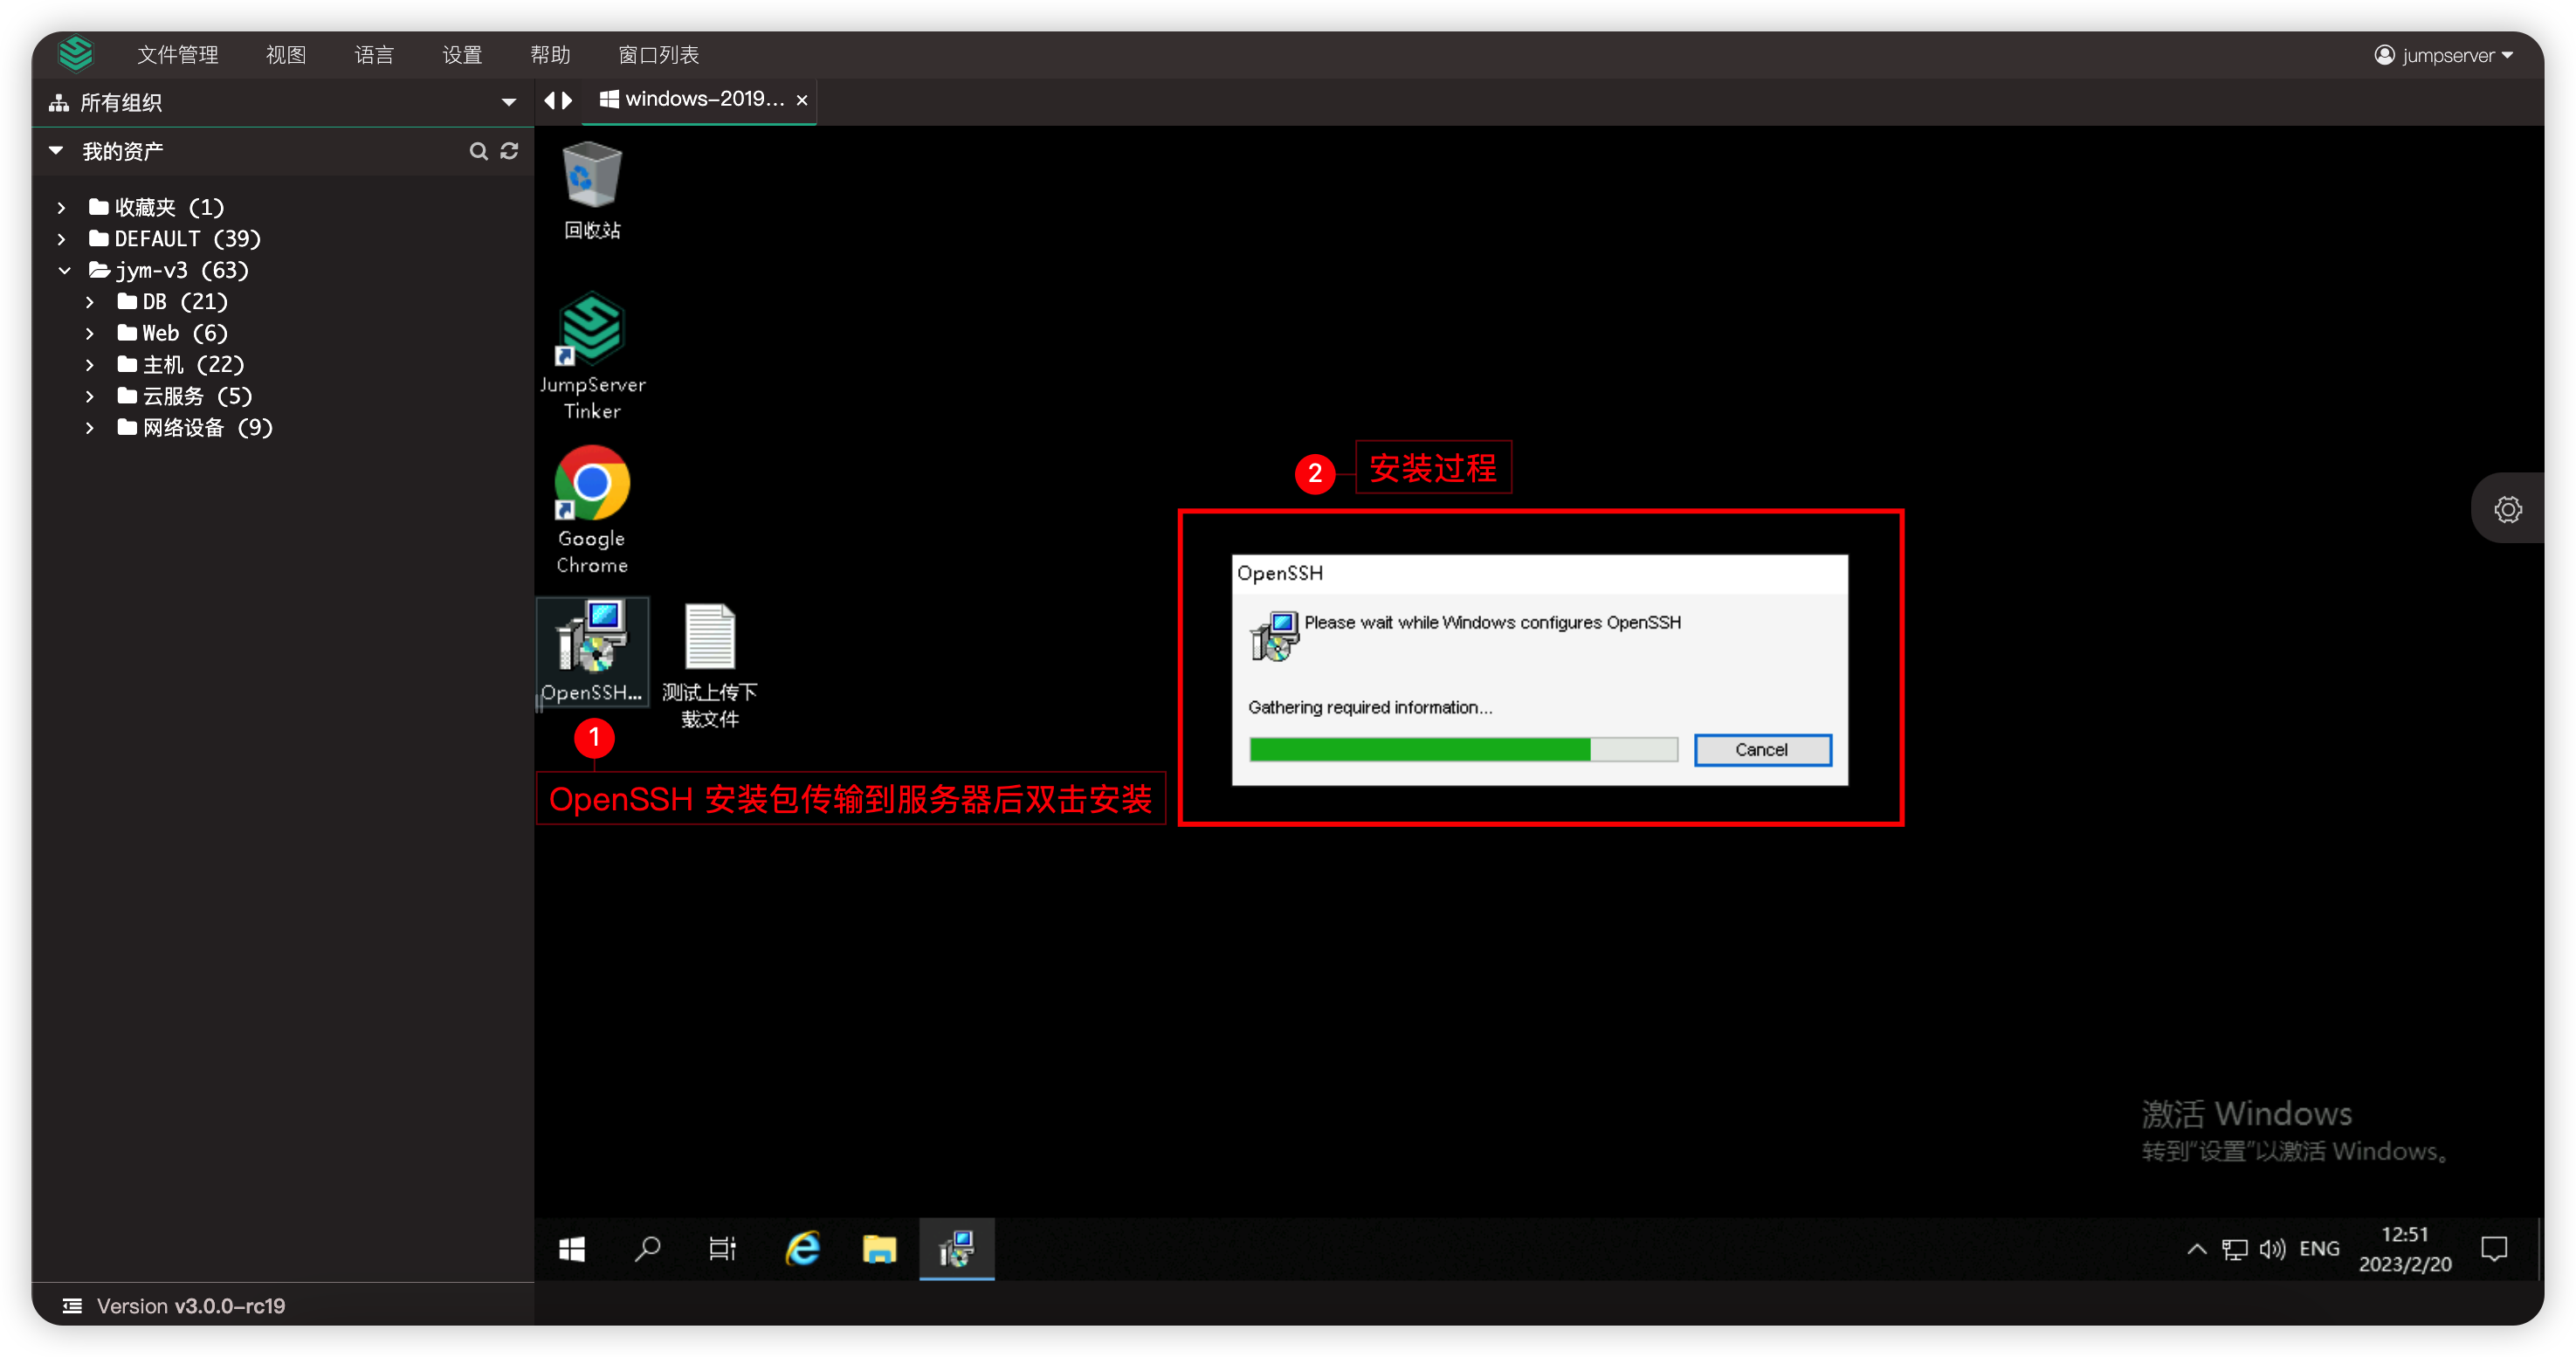
- OpenSSH configure successfully.
- Detailed Parameter Description:
| Parameter | Description |
|---|---|
| Name | Name of the RemoteAPP Server |
| IP/Host | IP address of RemoteAPP Server |
| Protocol Group | Protocol groups and ports supported by RemoteAPP Server |
| Account List | The connection account information for the RemoteAPP Server, e.g, would be Administrator |
| Automatic Account Creation | The account created through this option is used to connect to the RemotpAPP |
| The number of accounts created | The number of accounts created for user shared |
| IP Address of Core service | The communication address for the Agent on the RemoteAPP Server with the Core component of JumpServer is typically configured as the IP address or hostname of the JumpServer server |
| RDS License | Enable RDS License |
| RDS License Sever | Enable RDS License Server |
| RDS Authorization Mode | Select "Device" or "User" to set the authorization mode. A.Device:Allows one device (used by any user) to connect to the application deployment server. B.User:Grants one user access to the application deployment server from an unlimited number of client computers or devices |
| RDS Single-User Session | Choose between "Disable" or "Enable" to set the single-user single-session mode. A.Disable:Allow each user to connect to the server's remote desktop from multiple client computers simultaneously. B.Enable:Disallow each user from connecting to the server's remote desktop from multiple client computers simultaneously |
| RDS Maximum time of disconnection | If a session connection reaches this maximum time, the connection will be automatically terminated |
| RemoteAPP logout time limit | Logout time after a remote application session is disconnected |
2.3 RemoteAPP Deployment⚓︎
- After creating the application deployment server, you need to manually execute the deployment of the application deployment server by installing Python, Chrome, Navicat, DBeaver, or custom remote applications.
- Click on the
Name of RemoteAPP Serverto enter the details page,Select theDeploymenttab within the details page,Click theInitialize Deploymentbutton in the "Quick Update Module" section to initialize the RemoteAPP server.

2.4 View RemoteAPP server details⚓︎
- Clicking on
RemoteAPP Detailsbutton and enter the page of RemoteApp server details. - The page contains detailed information about the RemoteAPP, including a list of RemoteAPP accounts, RemoteAPP applications and deployment logs etc.
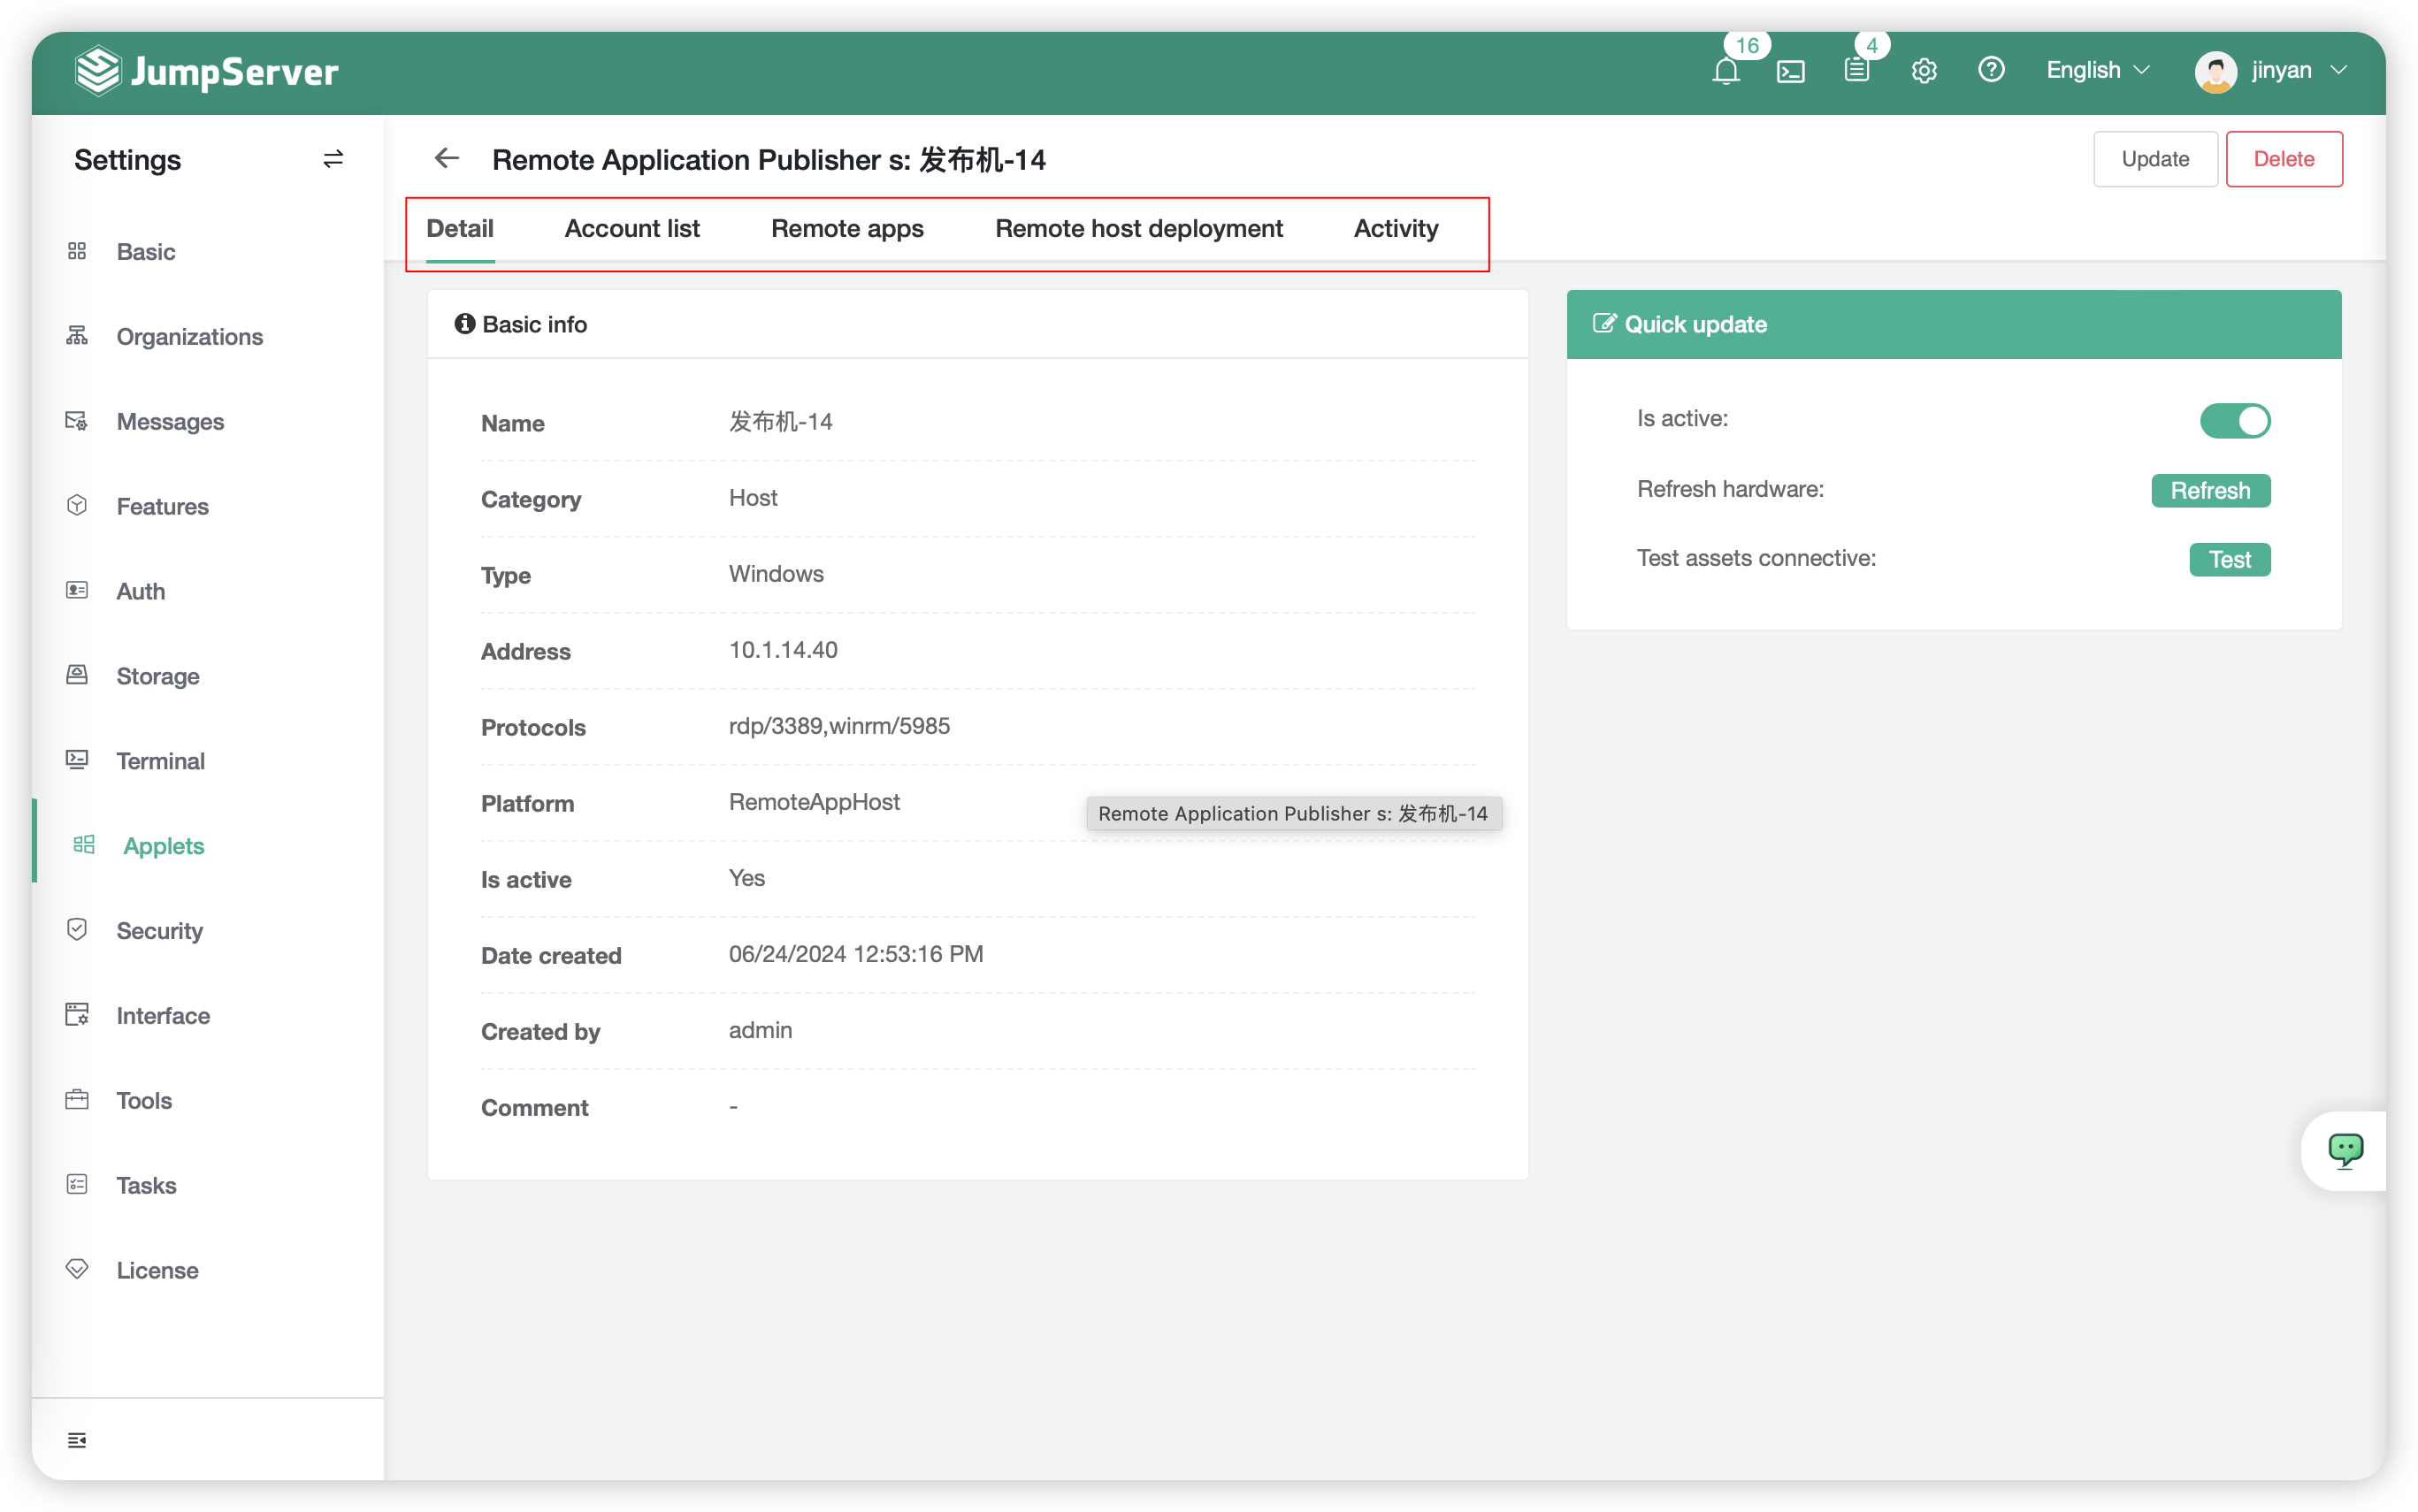
- Detailed Parameter Description:
| Module | Description |
|---|---|
| Details | This module primarily includes the basic information of the RemoteAPP server and simple automated tasks such as updating hardware information and testing connectivity. |
| Account List | This module primarily manages the accounts on the RemoteAPP server. By default, JumpServer creates 100 system users to support remote sessions |
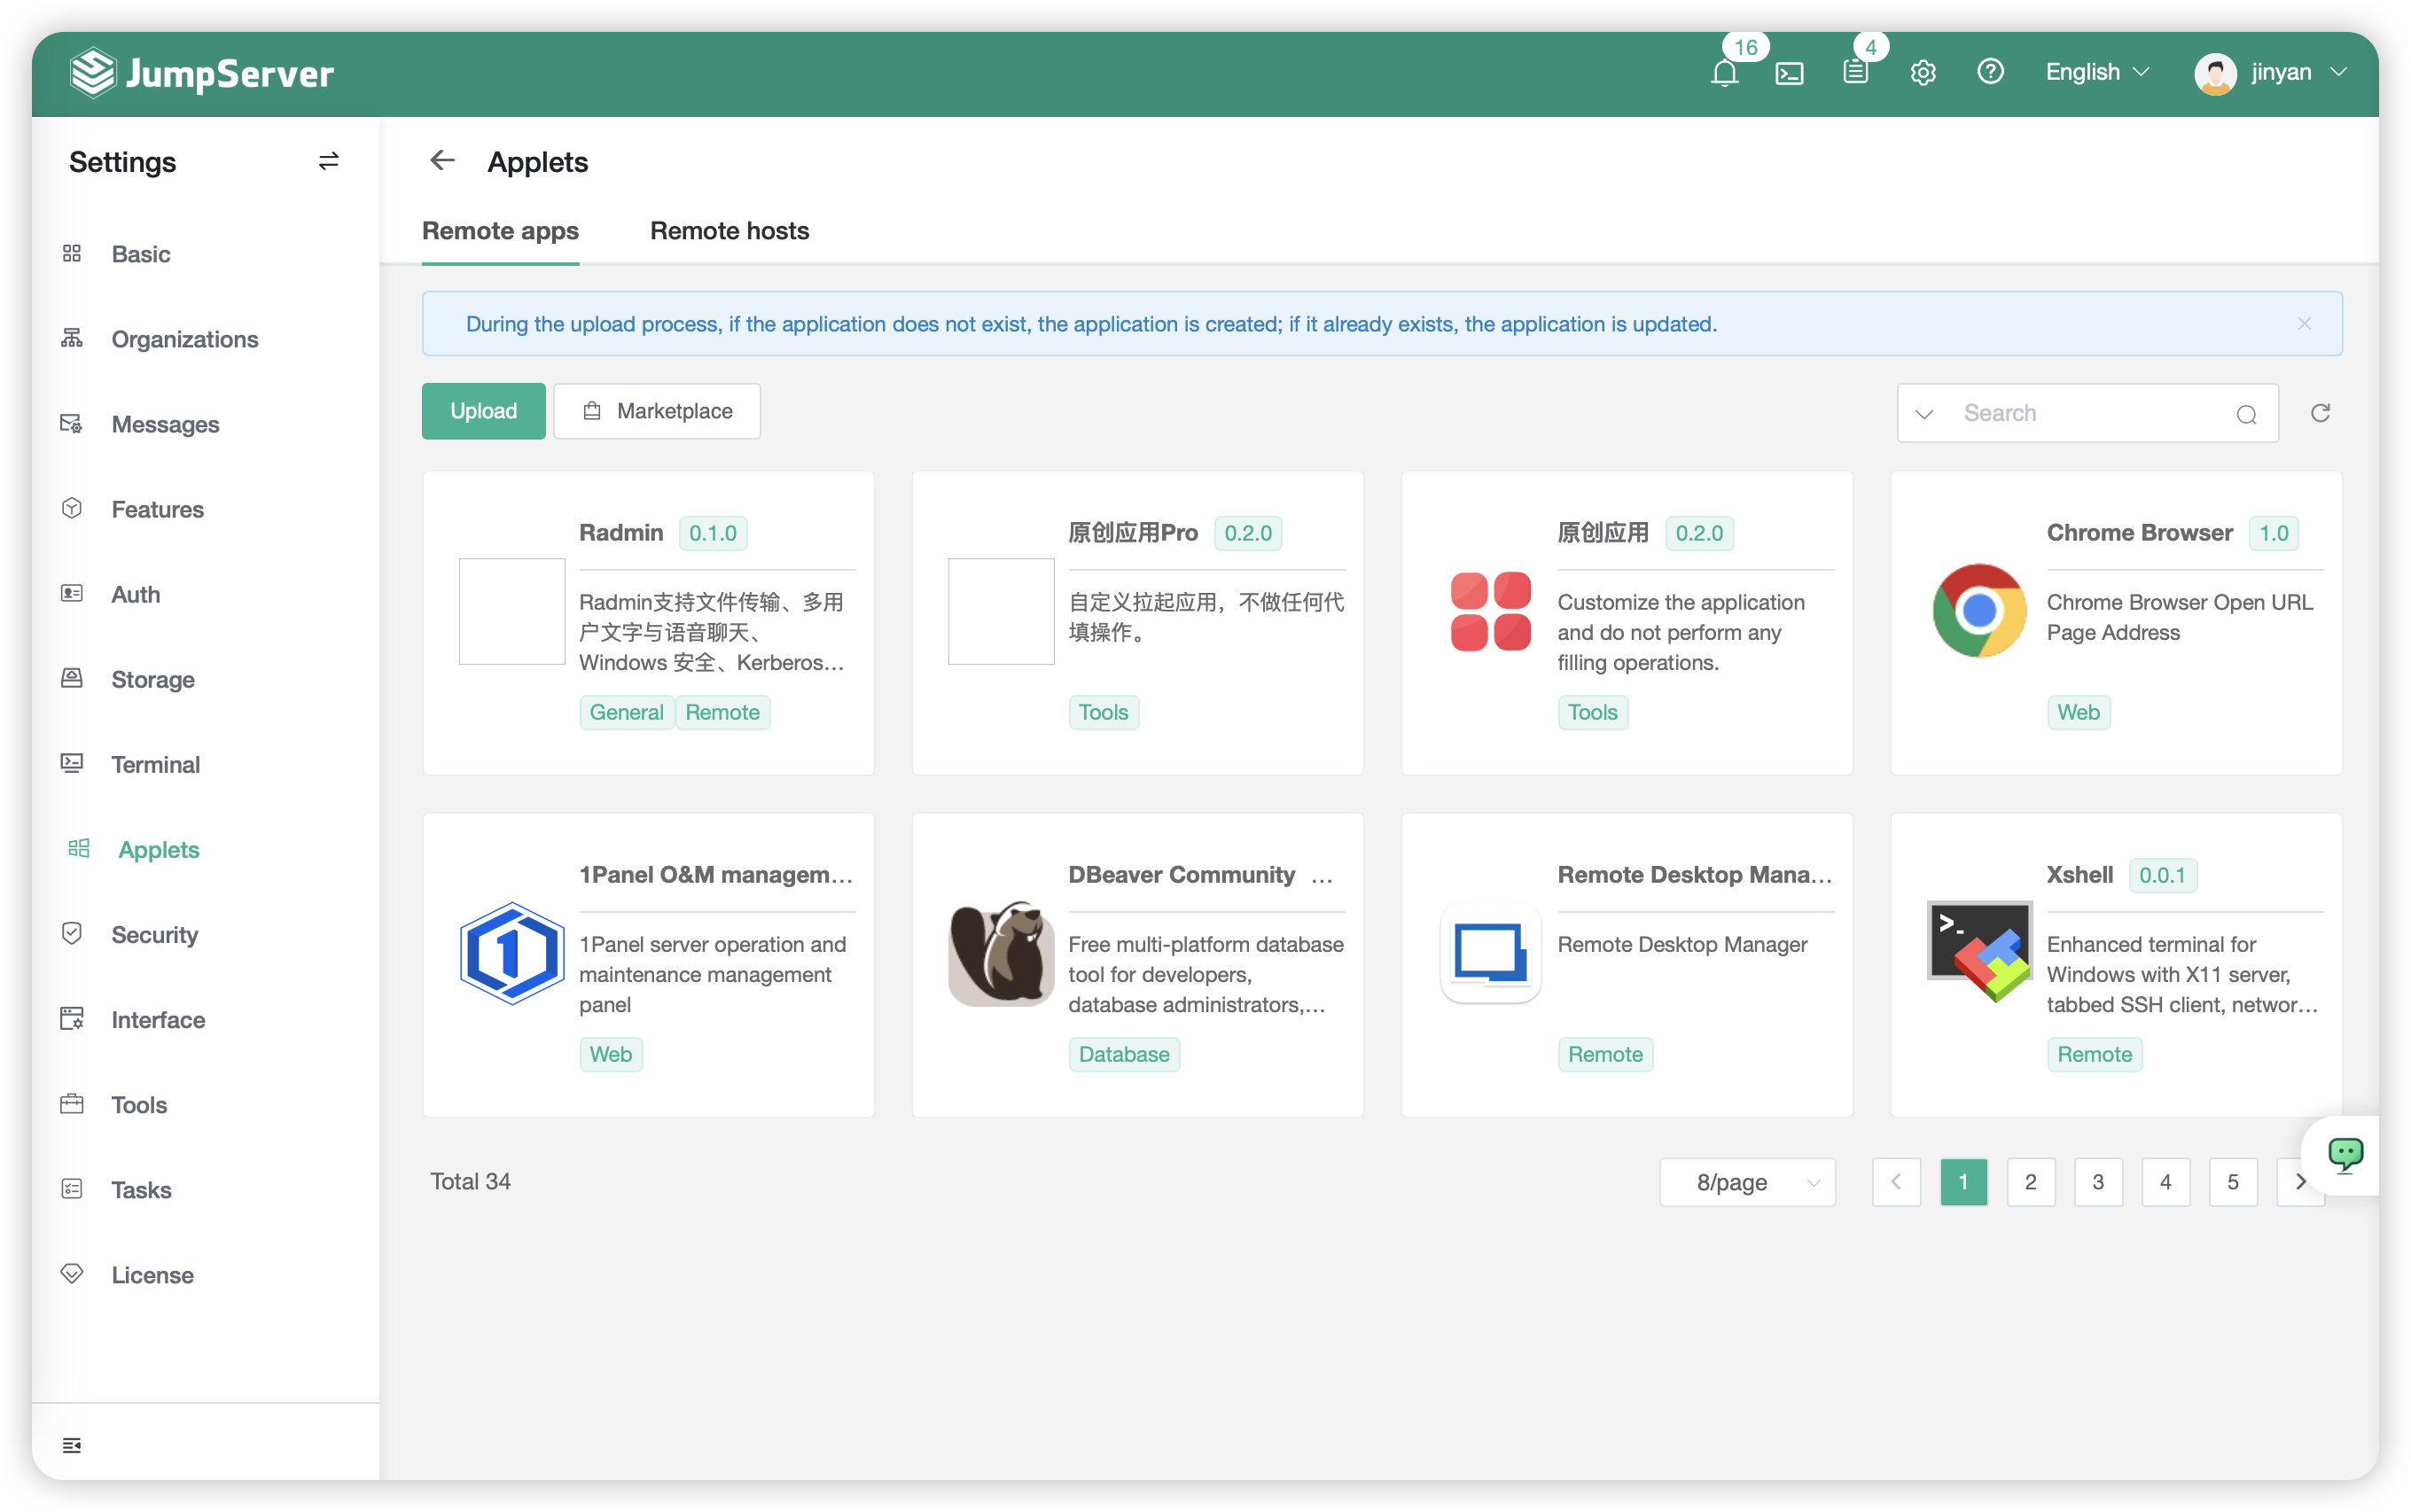
| Remote Application | This module contains default remote applications as well as custom remote application information. Within this module, you can directly deploy remote applications |
| RemoteAPP Deployment | This module is primarily used for the initial deployment of the RemoteAPP server and for viewing deployment logs |
| Activity Logs | This module records activity log for the RemoteAPP server. Clicking on it allows you to view the details of the activity |
3 Remote Application⚓︎
- Creating remote application resources allows for remote access to asset and implements password autofill functionality.
- For example, here's the process of accessing JumpServer web page with password autofill:
3.1 Create Website Asset⚓︎
- Click and switch to view of
ConsoleatAsset Management-Asset ListPage. - Select
Webtab,click to create Website asset.
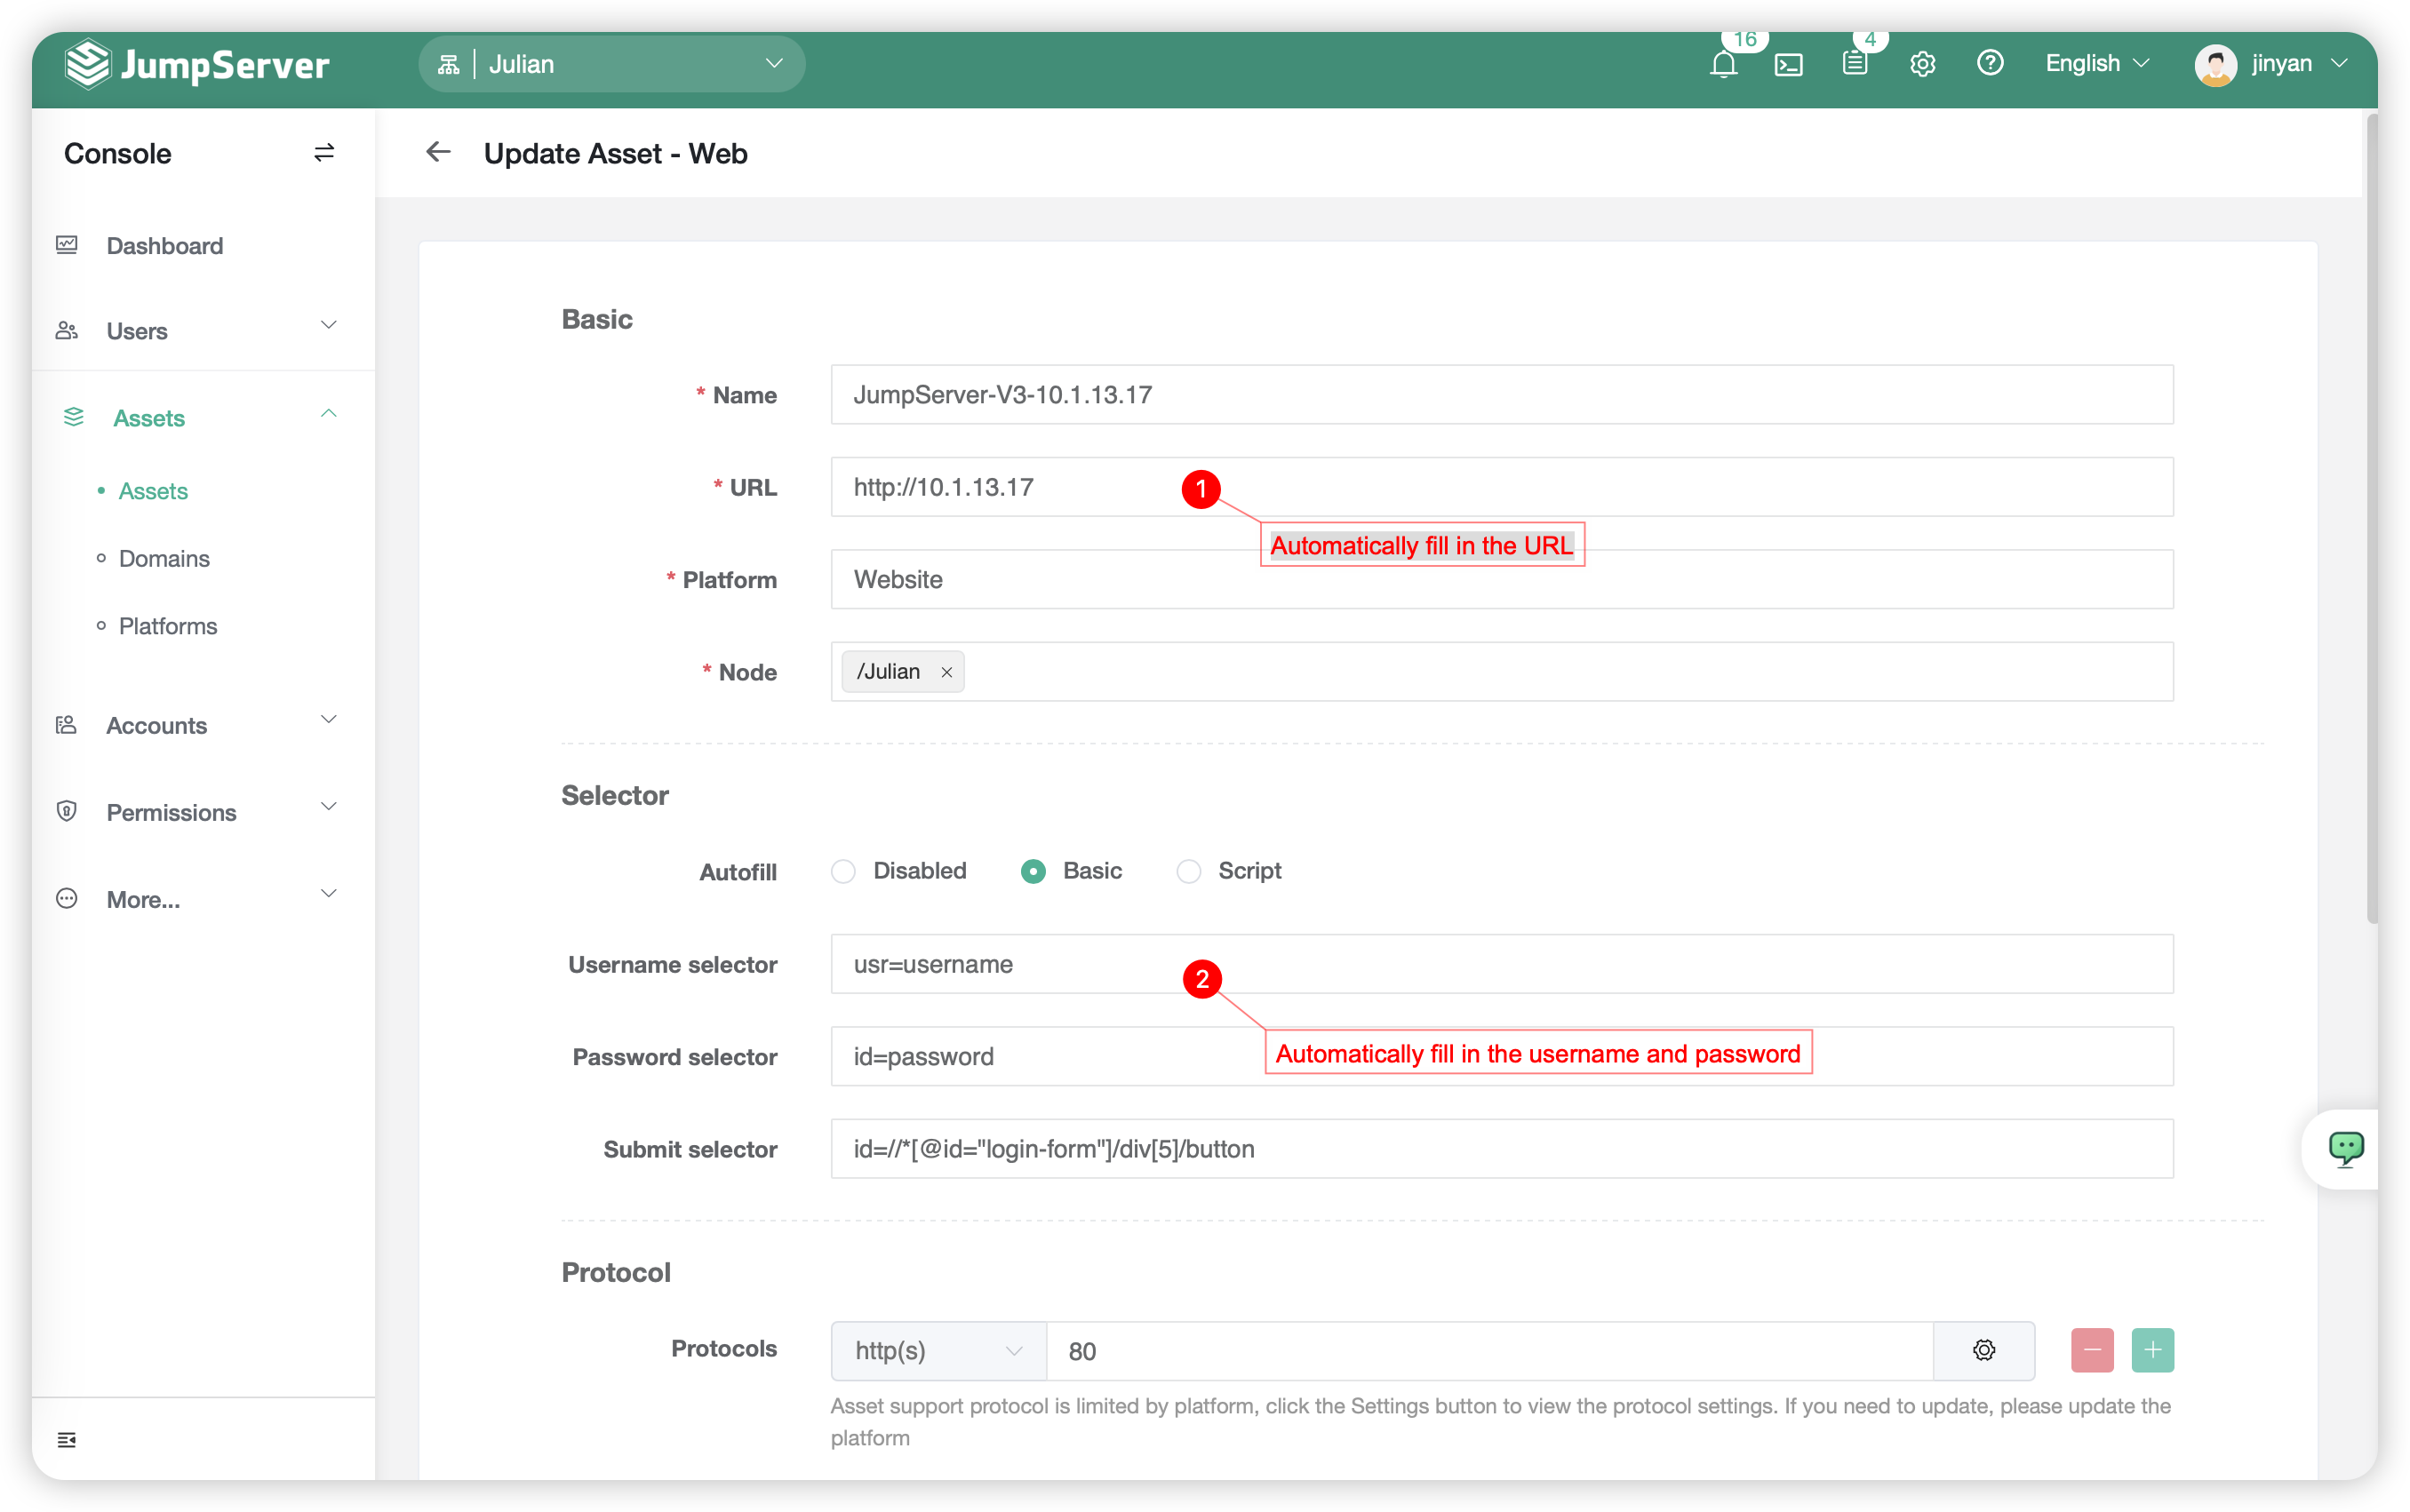
- The
Selectorparameter needs to be obtained from the code parameters on the target URL page. - For elements details you can open the developer tools page for the target URL using
F12:
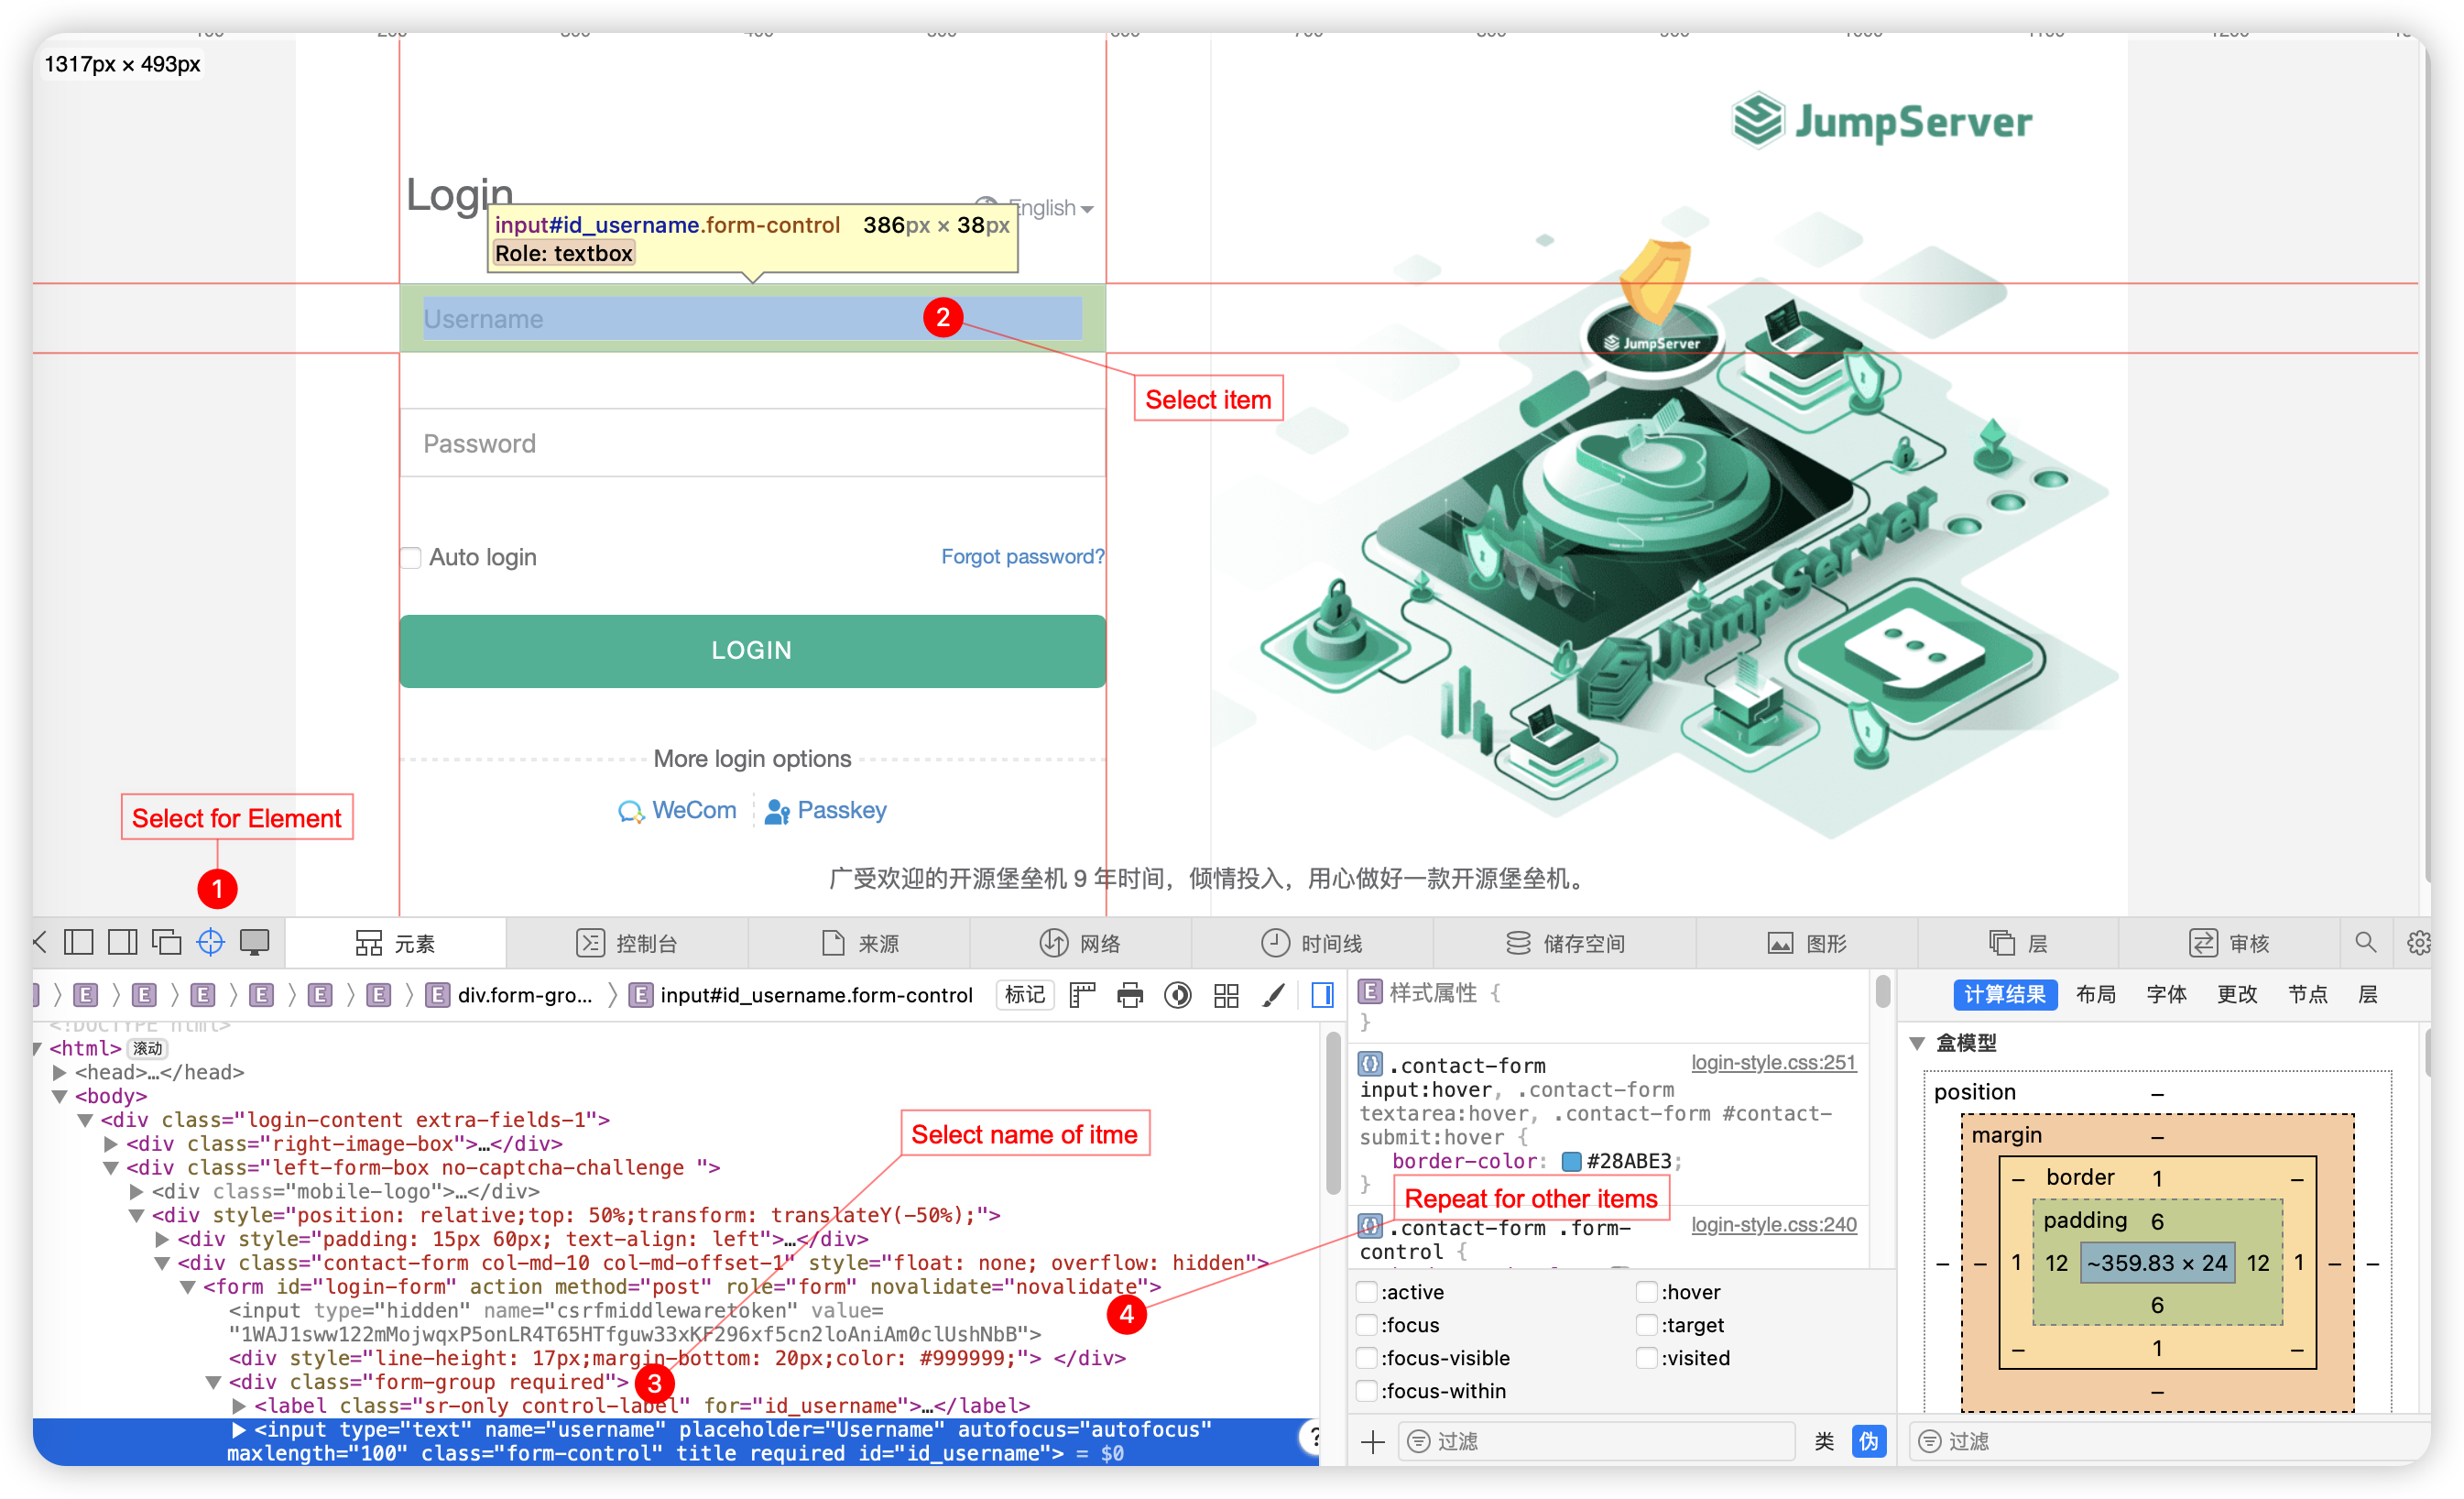
- Fill in the obtained parameters to the target website asset created, referring to the first image in the current page's
3.1 Tittle.
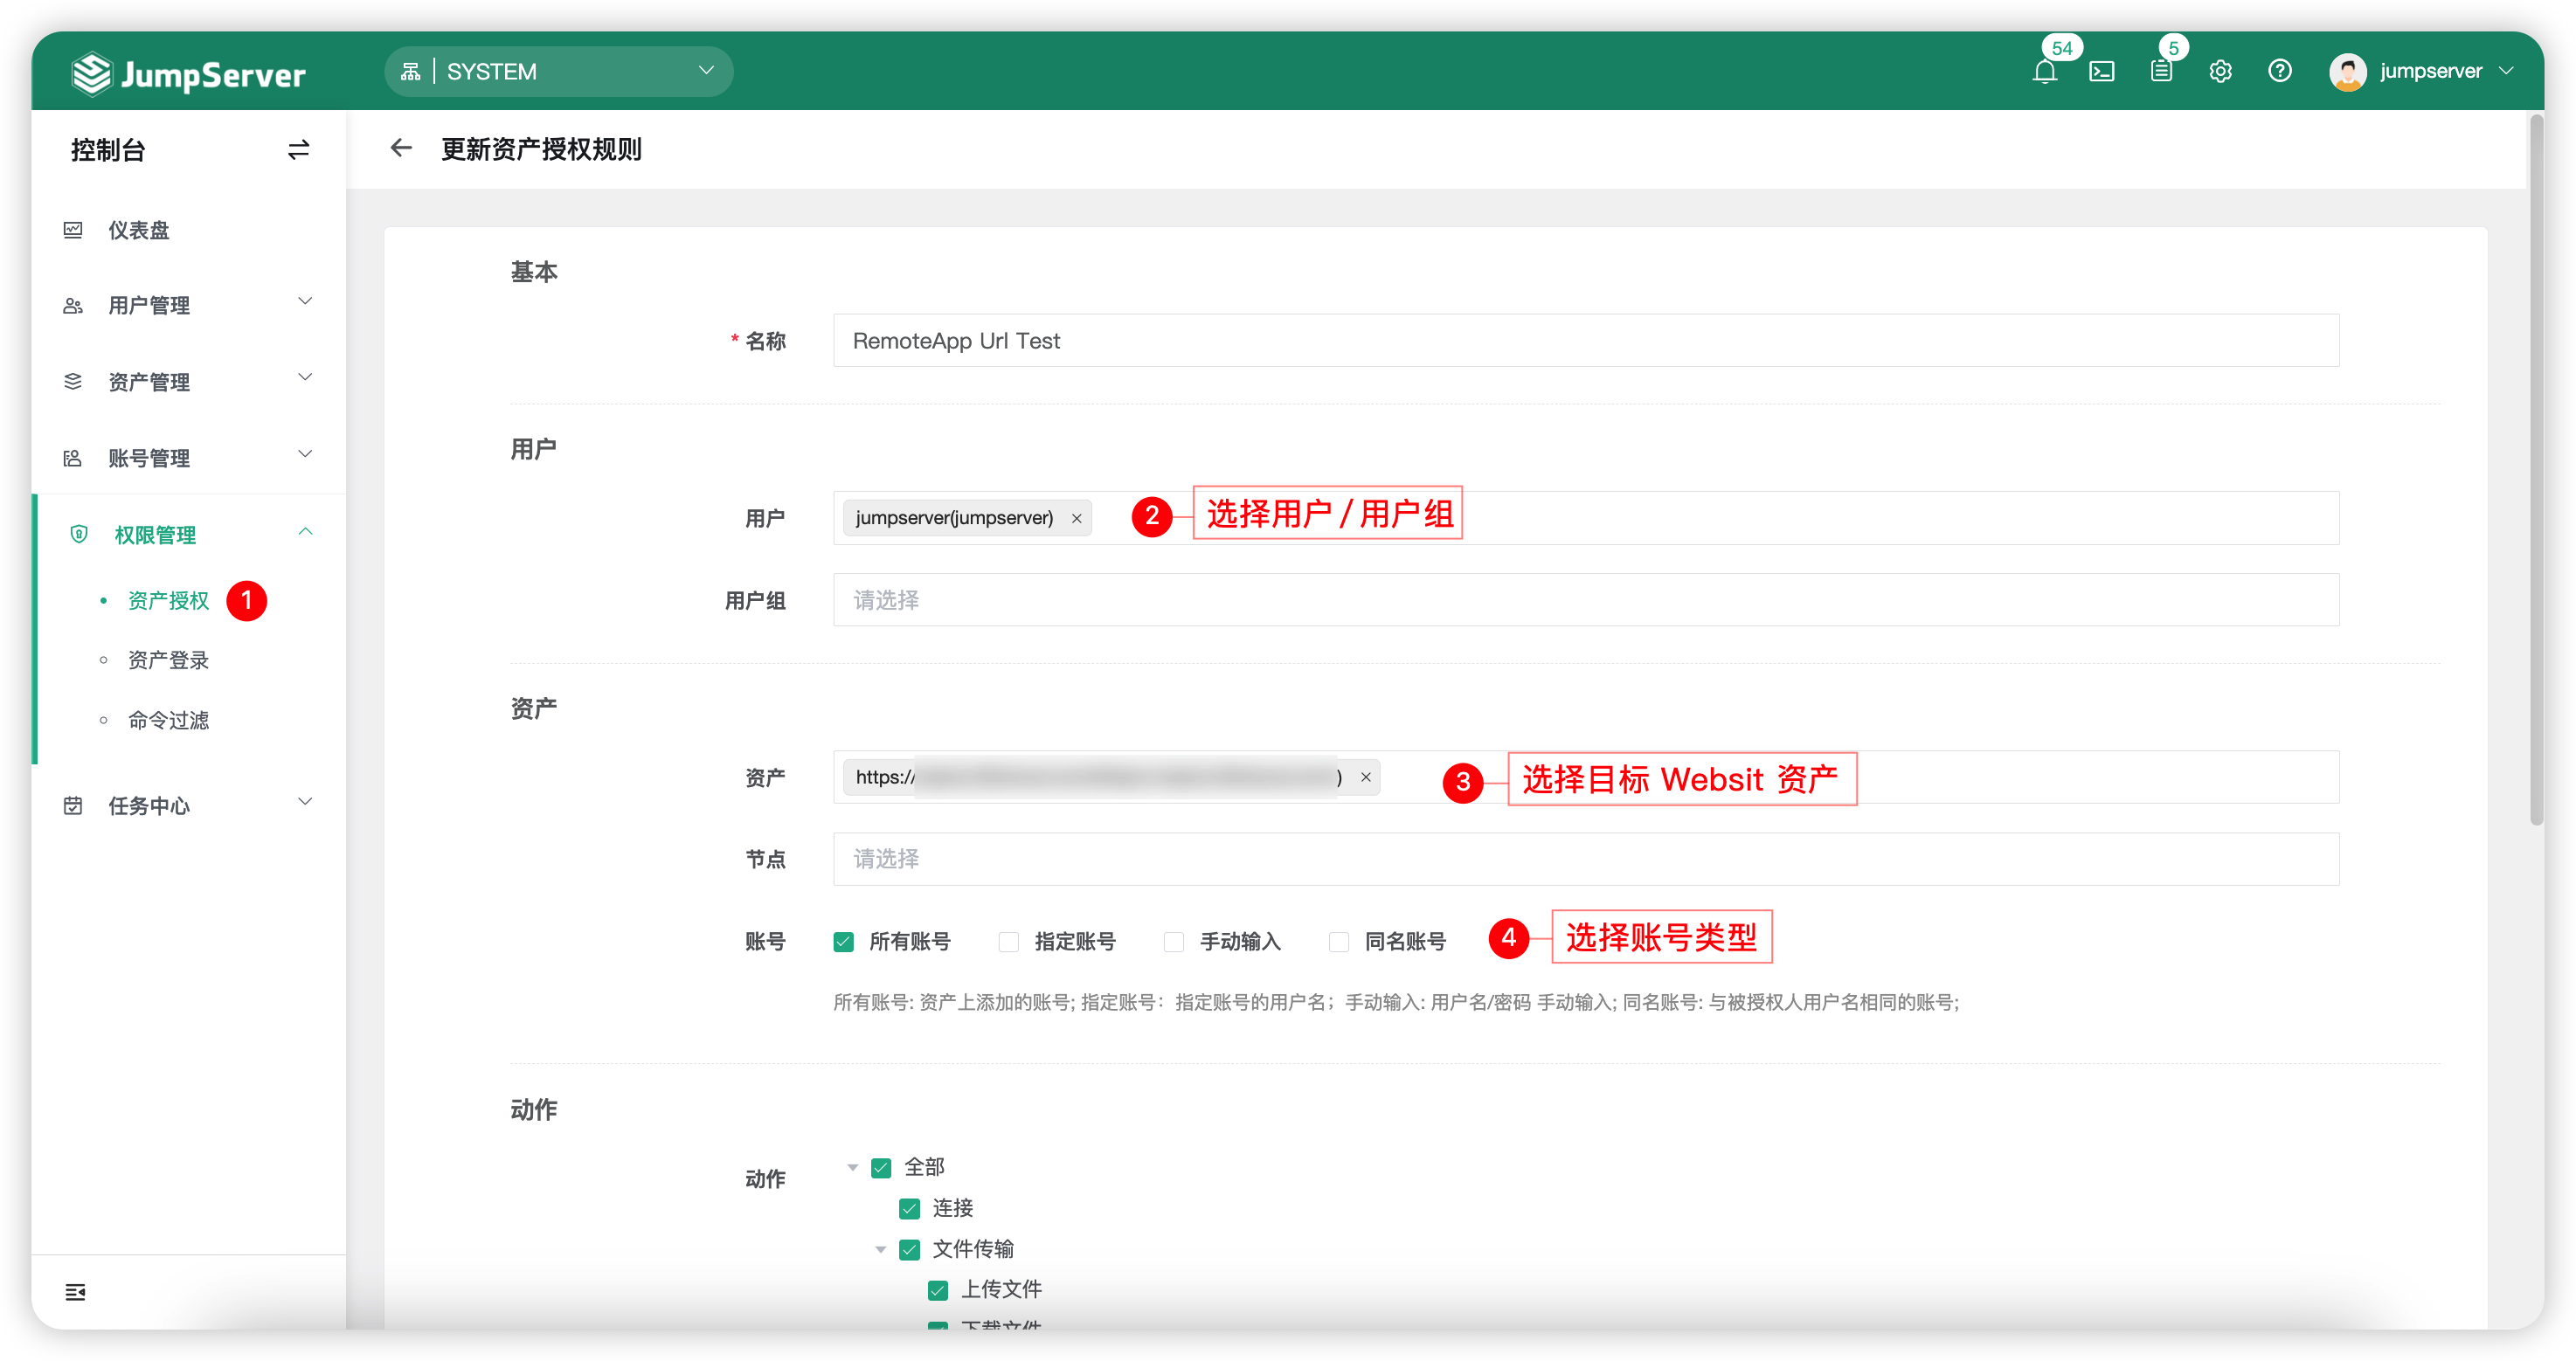
3.2 Create rule of asset authorization⚓︎
- Click and switch to
Permission Management-Asset Authorizationpage. - Create a new rule of authorization,following the figure:
3.3 Access Website asset⚓︎
- To access the target Website asset through the
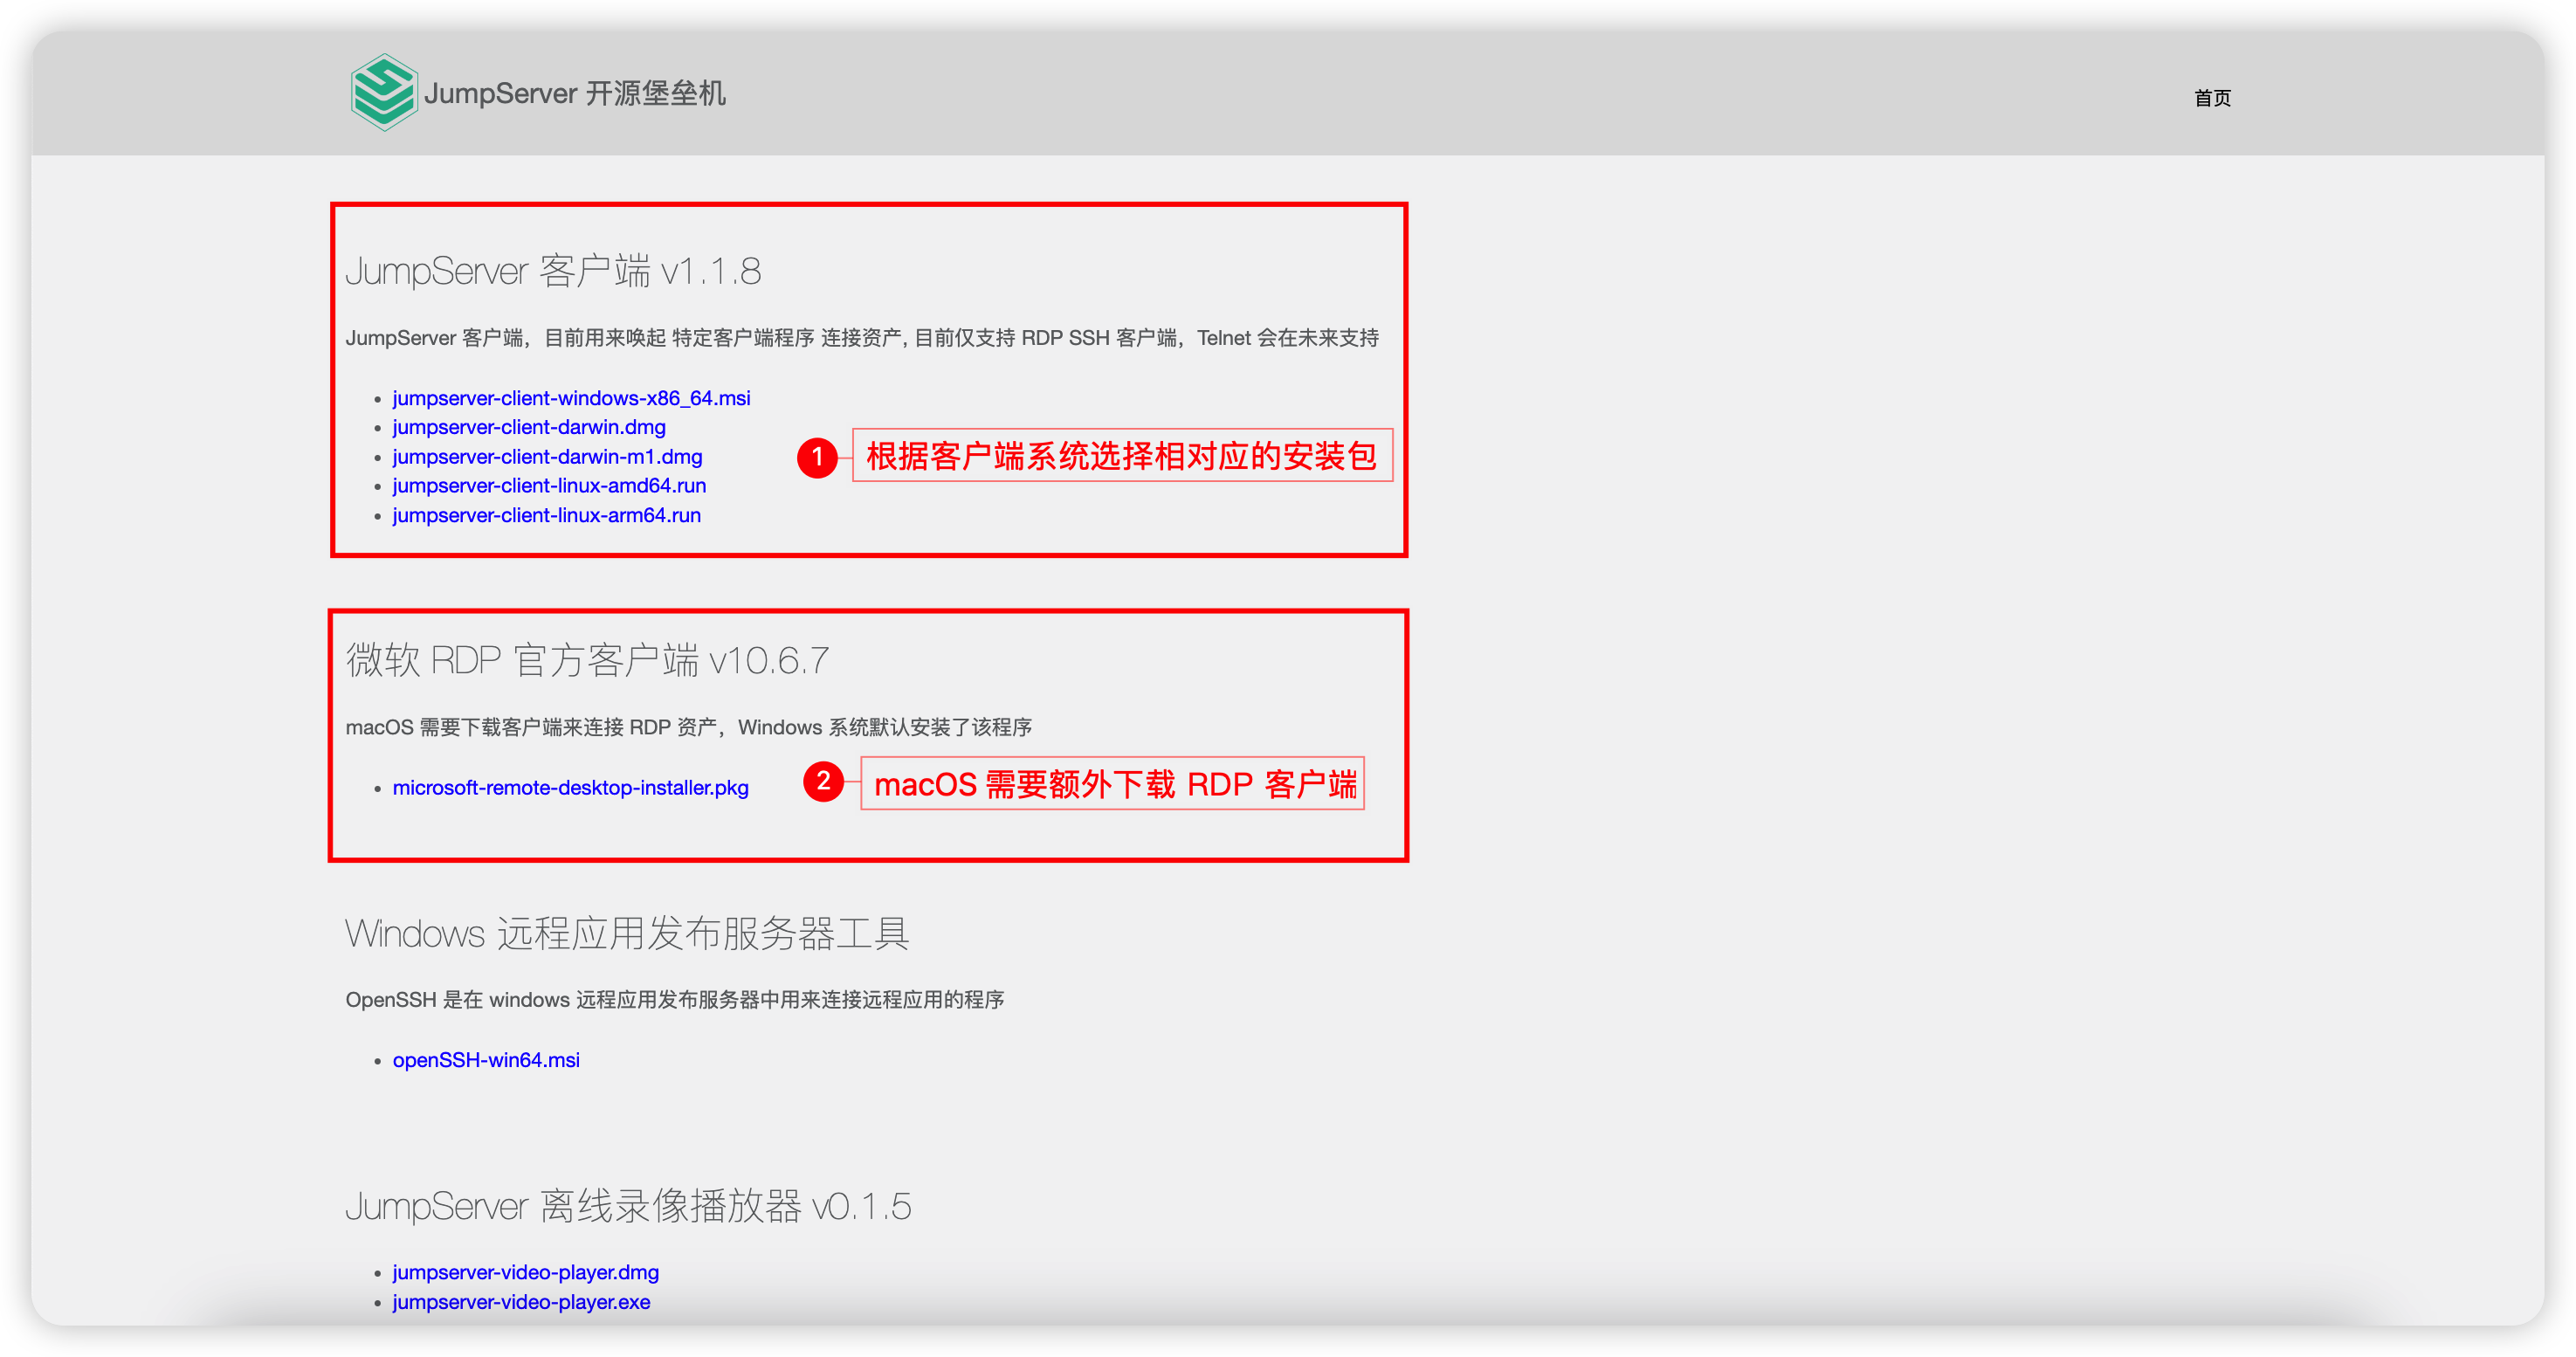
Web Terminal, you'll need to follow these steps: - Accessing Website assets requires the local client to install the JumpServer client program. The installation package can be found on the JumpServer page -
Web Terminal-Help-Downloadpage.
3.4 Page Layout⚓︎
- The current RemoteAPP page layout is:
4 Customized Applet⚓︎
4.1 Applet Introduction⚓︎
- Applet is a directory that contains Python scripts and must include at least the following files:
├── i18n.yml
├── icon.png
├── main.py
├── manifest.yml
└── setup.yml
- Description of the purpose of file name:
| File Name | Description |
|---|---|
| main.py | Auto filled executed script of Python |
| icon.png | ICON of Applet |
| manifest.yml | Applet elements |
| setup.yml | Installation description |
| i18n.yml | The file for manifest.yml internationalization |
4.2 Metadata Description with Manifest.yml⚓︎
- Manifest.yml defines the metadata of Applet, such as name, author, version, and supported protocols.
name: mysql_workbench8 (required)
display_name: MySQL Workbench8
comment: A tool for working with MySQL, to execute SQL and design tables (required)
version: 0.1 (required)
exec_type: python (reserved,Not yet used)
author: Eric (required)
type: general (required)
update_policy: none (Not yet used)
tags: (required)
  - database
protocols: (required)
  - mysql
- Detailed Parameter Description:
| Parameter | Description |
|---|---|
| name | The name should preferably be alphabetical and not contain special characters |
| protocols | Protocols supported by Applet script |
| tags | Labels |
| type | Mainly option is General or Web。 |
| i18n.yml | The file for manifest.yml internationalization |
4.3 Installation conditions with setup.yml⚓︎
- setup.yml defines the installation type of programs called up by Applet
type: msi # exe, zip, manual
source: https://jms-pkg.oss-cn-beijing.aliyuncs.com/windows-pkgs/mysql-workbench-community-8.0.31-winx64.msi
arguments:
  - /qn
  - /norestart
destination: C:\Program Files\MySQL\MySQL Workbench 8.0 CE
program: C:\Program Files\MySQL\MySQL Workbench 8.0 CE\MySQLWorkbench.exe
md5: d628190252133c06dad399657666974a
- Detailed Parameter Description:
| Parameter | Description |
|---|---|
| type | Installation type of software msi:Installable softwar. exe:Installable software. zip:Unzip to install software。 manual:Installation manually |
| source | Softwaer download address |
| arguments | Arguments need by installation of msi or exe with silent installation |
| destination | Program installation directory |
| program | Specific software address。 |
| md5 | Md5 of the program,Mainly used to verify whether the installation was successful |
- If you choose manual installation, keep the source and other fields empty, and do not verify the MD5 value. You need to manually login to the Apple host (application publishing machine) to install the software.
4.4 Script execut with main.py⚓︎
- main.py is the main program with python
- The remoteapp program Tinker on JumpServer will be executed by calling 'Python main.py base64_json_data'.
- Base64_json_data is a string of JSON data after base64, containing authentication information such as assets and accounts. The data format is as follows, and adjustments should be made according to API changes:
{
  "app_name": "mysql_workbench8",
  "protocol": "mysql",
  "user": {
    "id": "2647CA35-5CAD-4DDF-8A88-6BD88F39BB30",
    "name": "Administrator",
    "username": "admin"
  },
  "asset": {
    "asset_id": "46EE5F50-F1C1-468C-97EE-560E3436754C",
    "asset_name": "test_mysql",
    "address": "192.168.1.1",
    "protocols": [
      {
        "id": 2,
        "name": "mysql",
        "port": 3306
      }
    ]
  },
  "account": {
    "account_id": "9D5585DE-5132-458C-AABE-89A83C112A83",
    "username": "root",
    "secret": "test"
  },
  "platform": {
    "charset": "UTF-8"
  }
}