Function Setting⚓︎
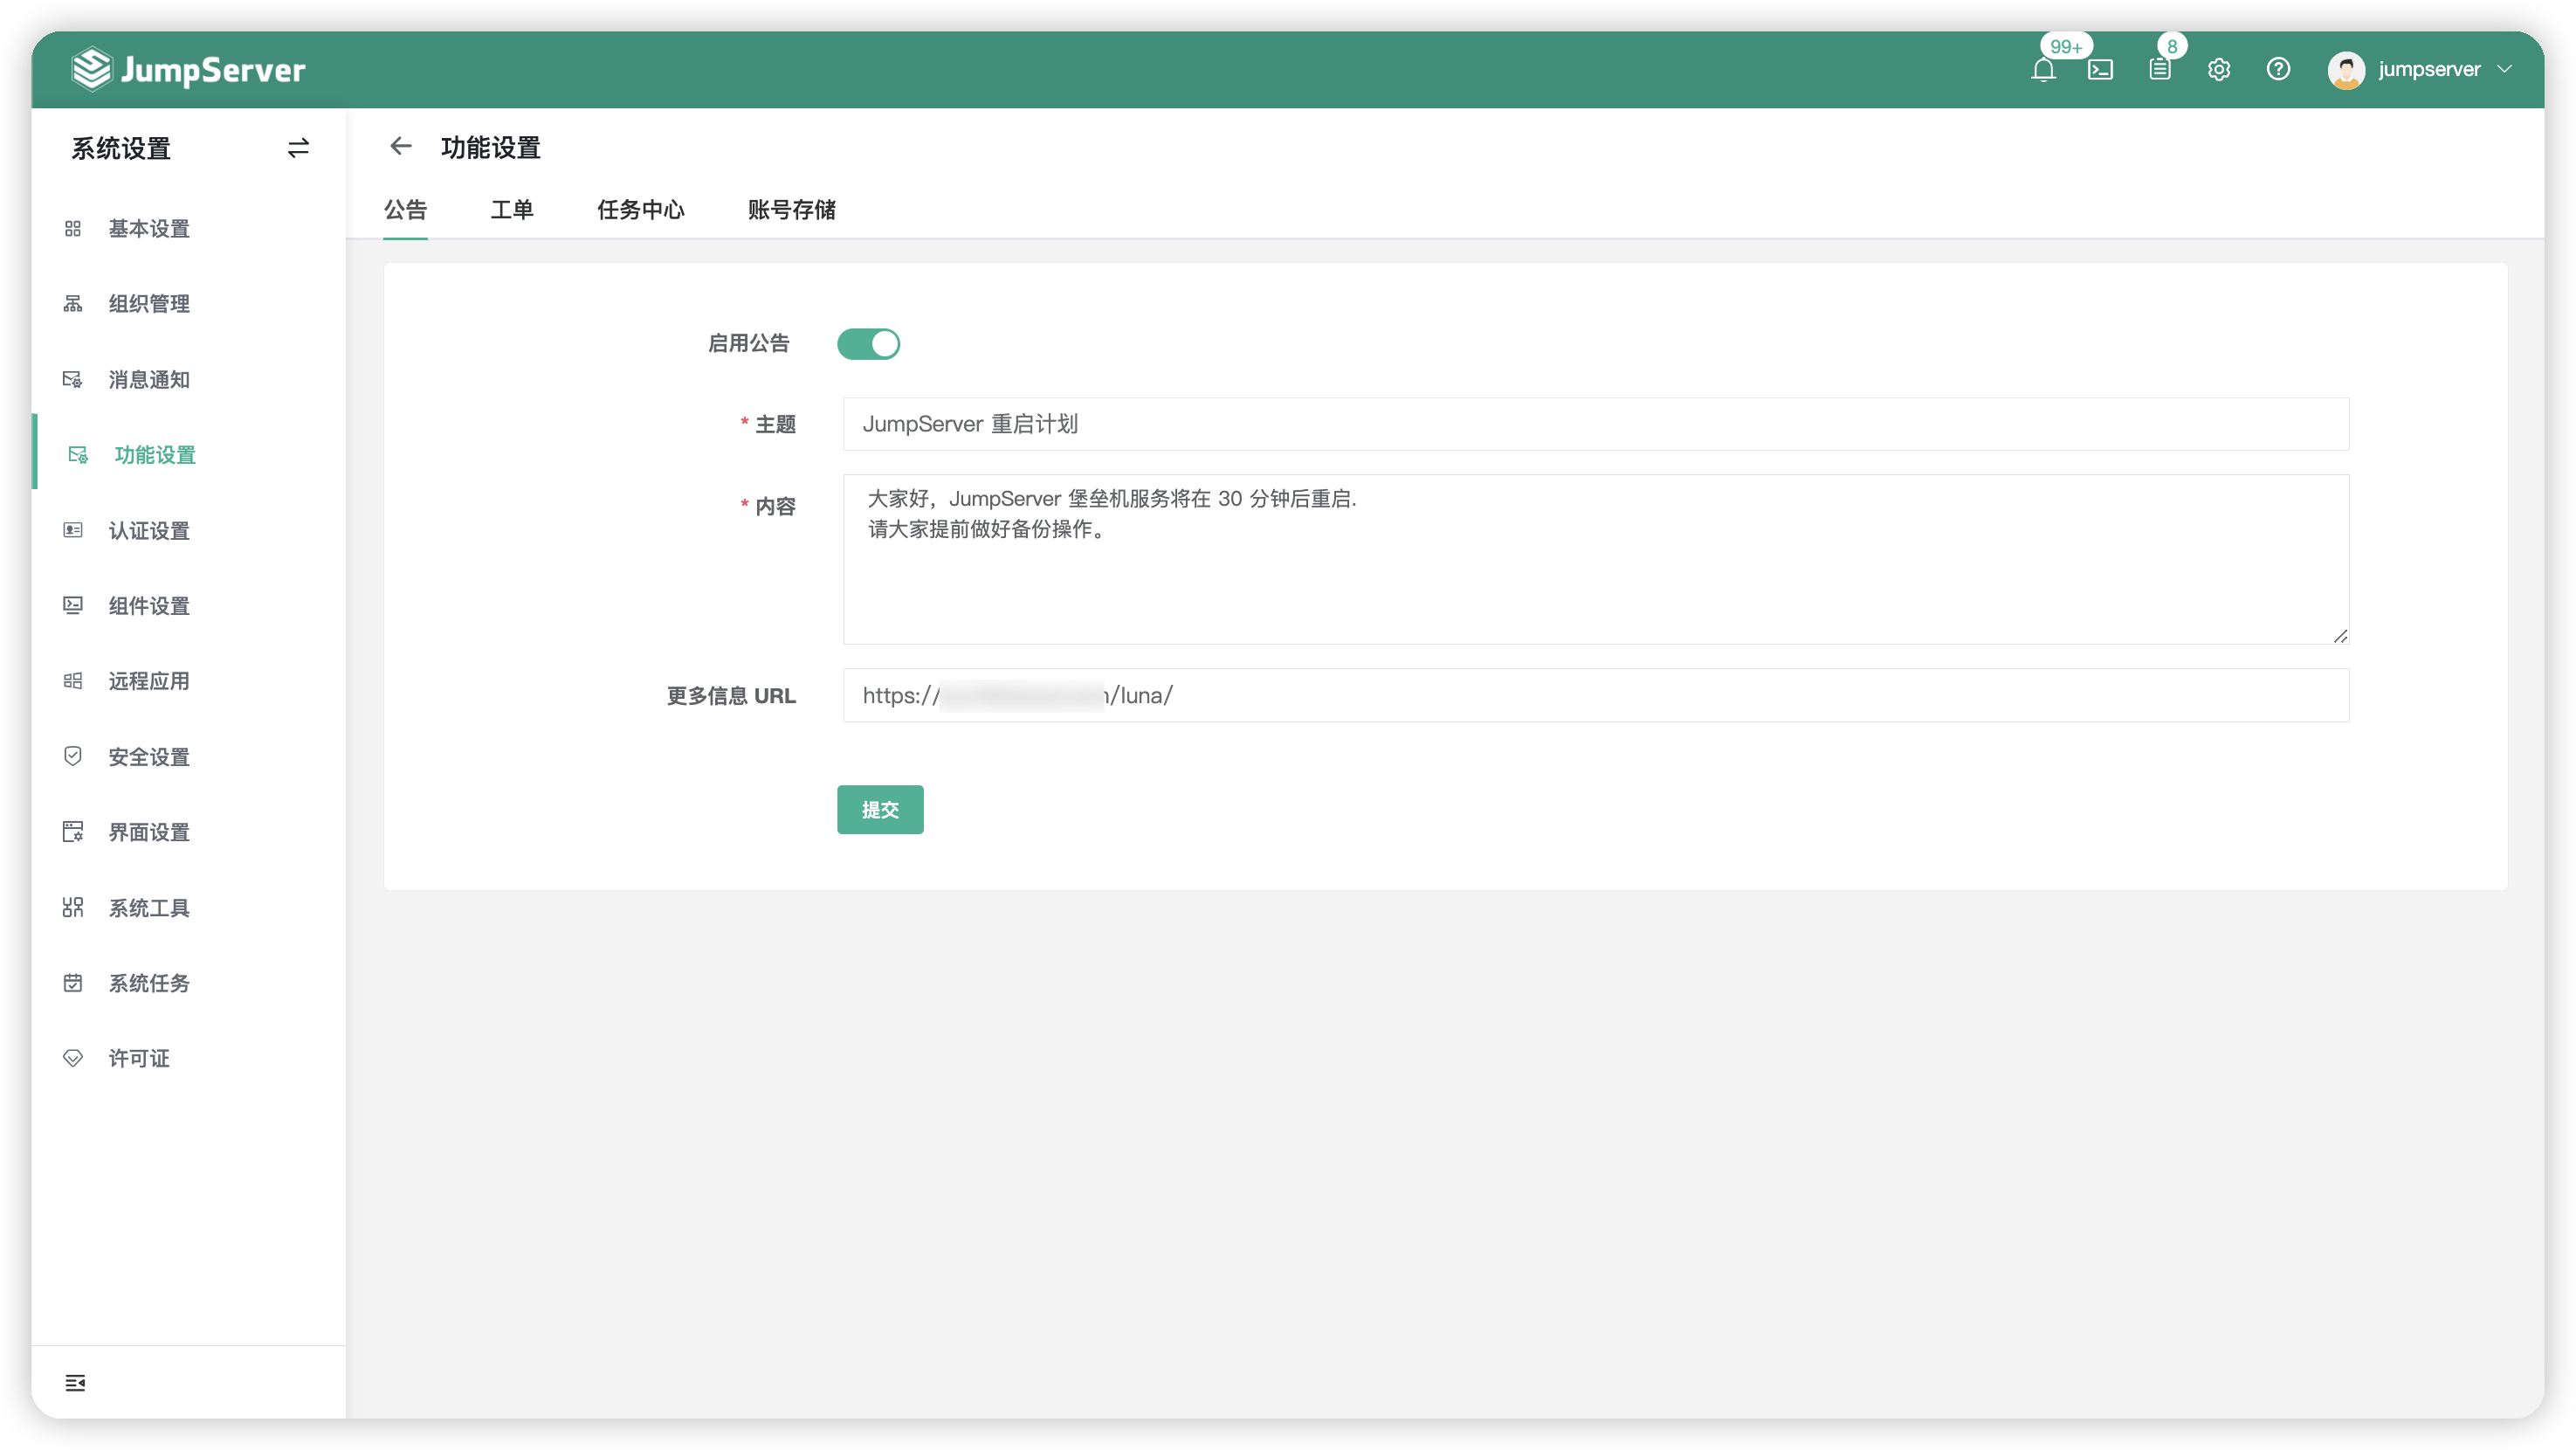
1 Notice⚓︎
- Clicking on the
Noticebutton at the top of the page and switch to the notice settings page. - On this page, you can customize whether to enable the
Noticefeature and set theNotice Contentto be displayed globally on the JumpServer page.
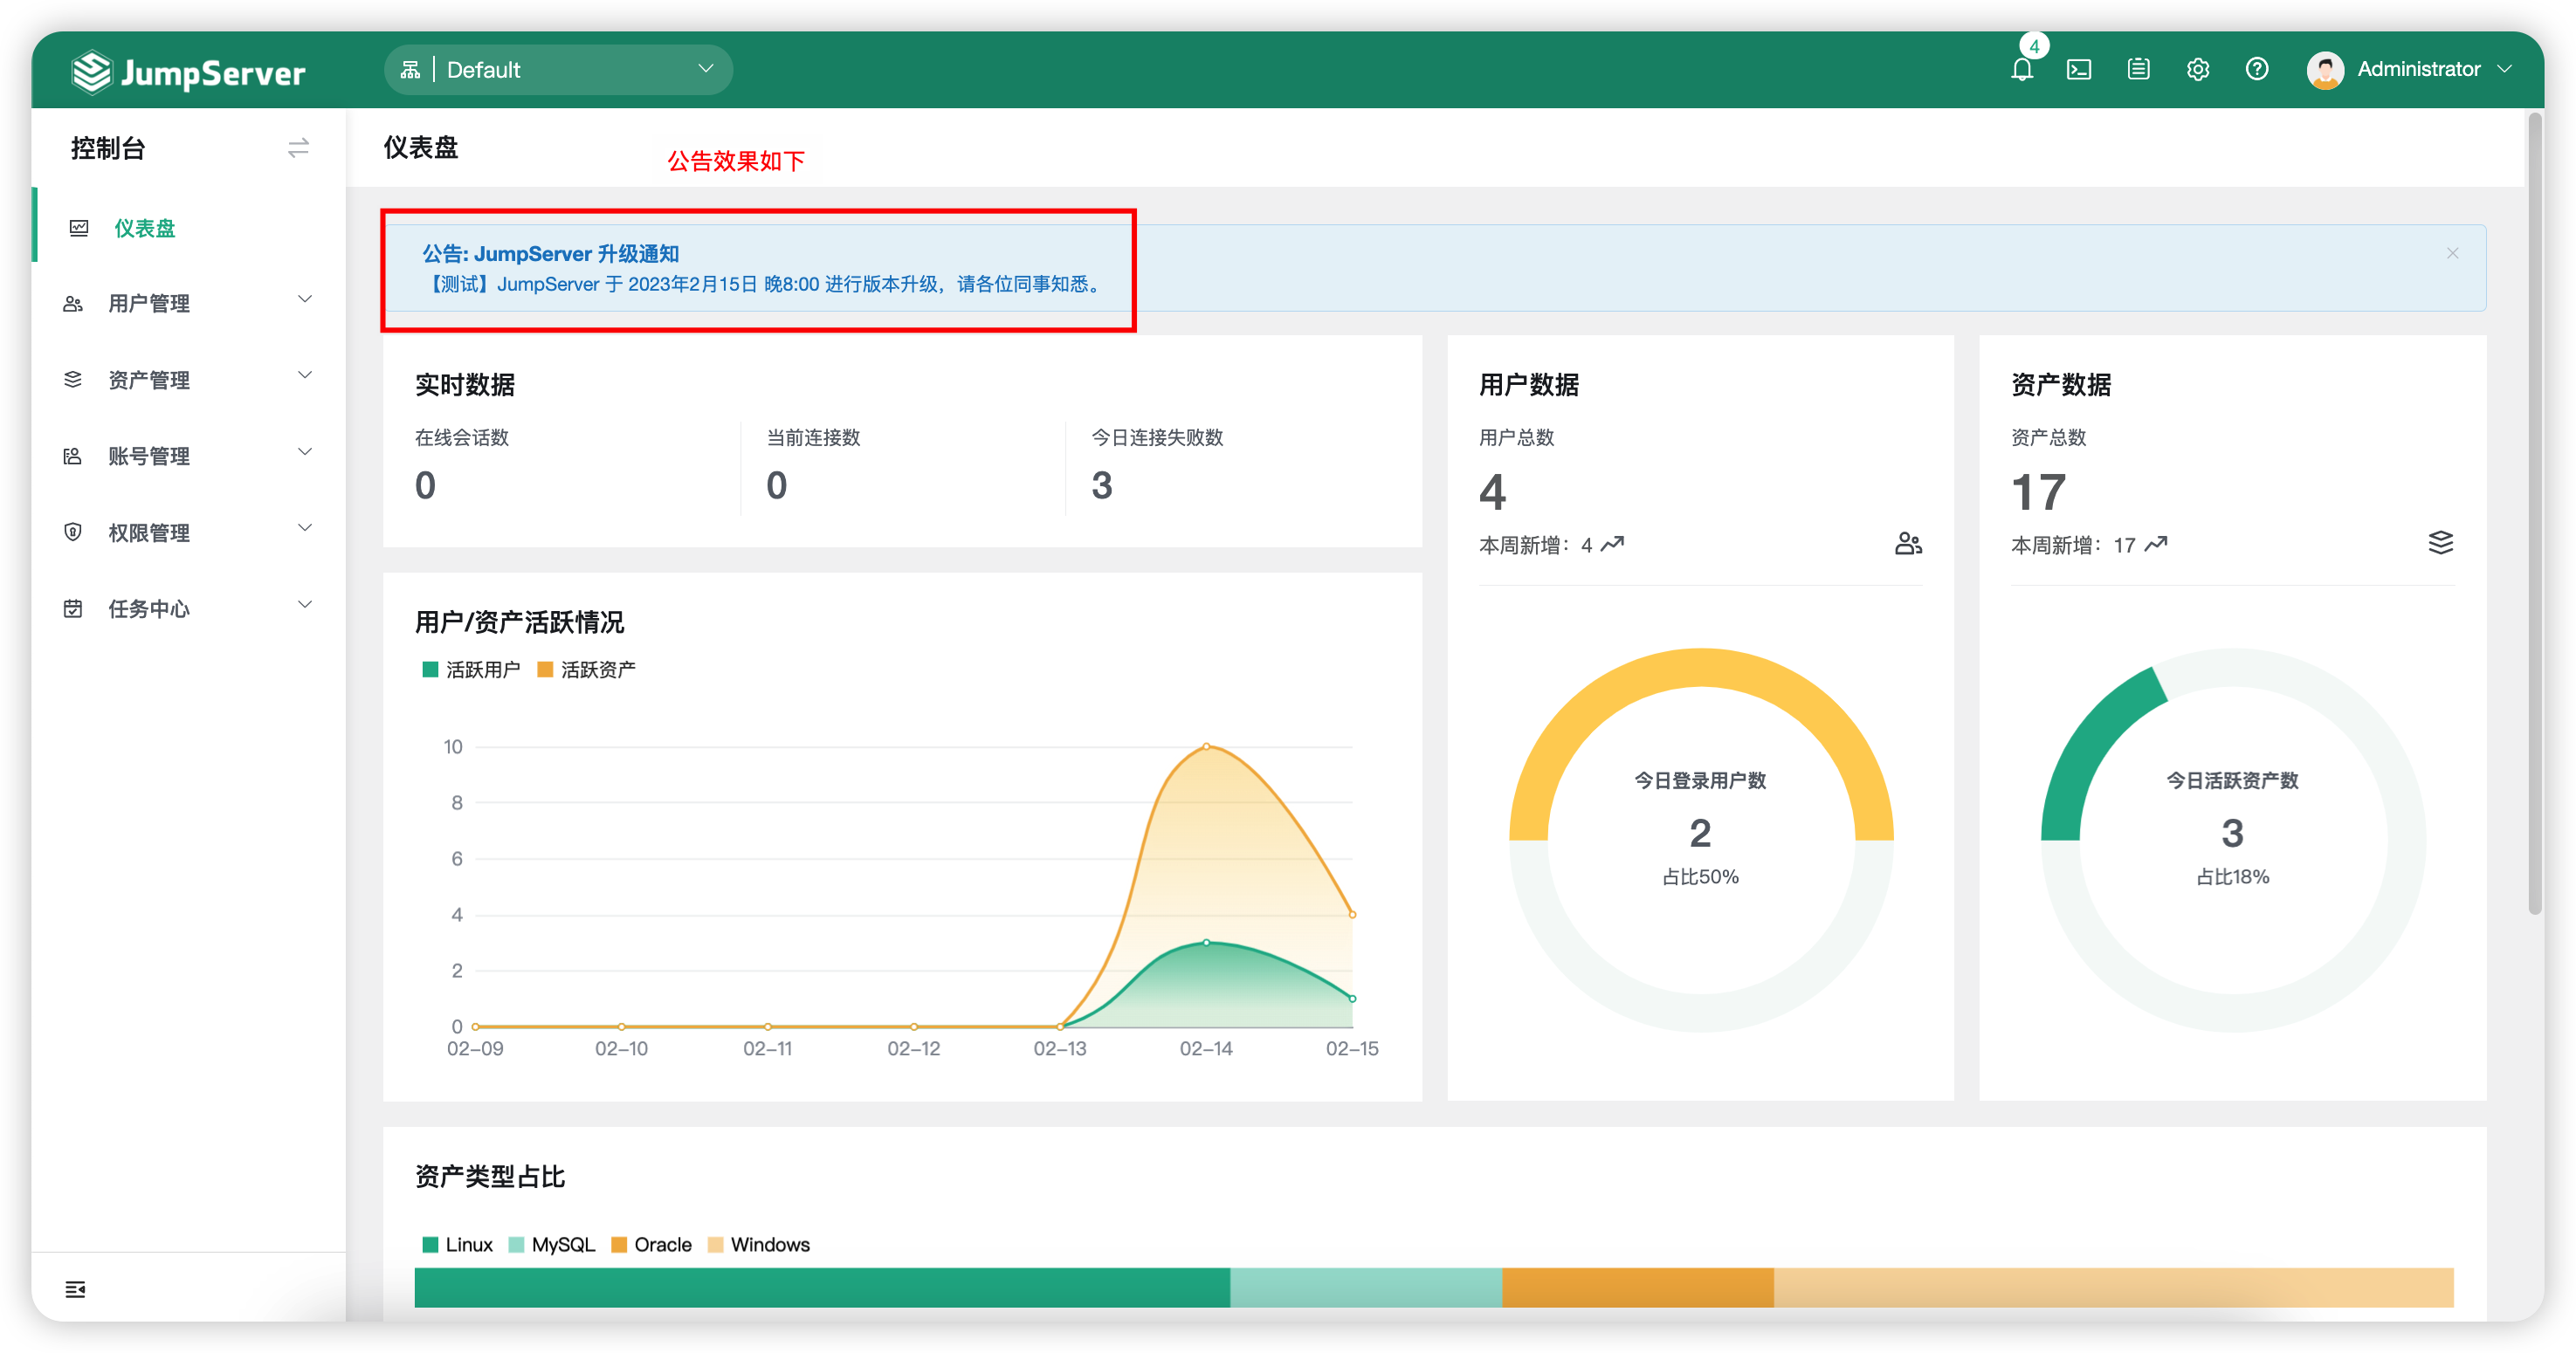
- After enable the notice feature, the notice page will display as follows:
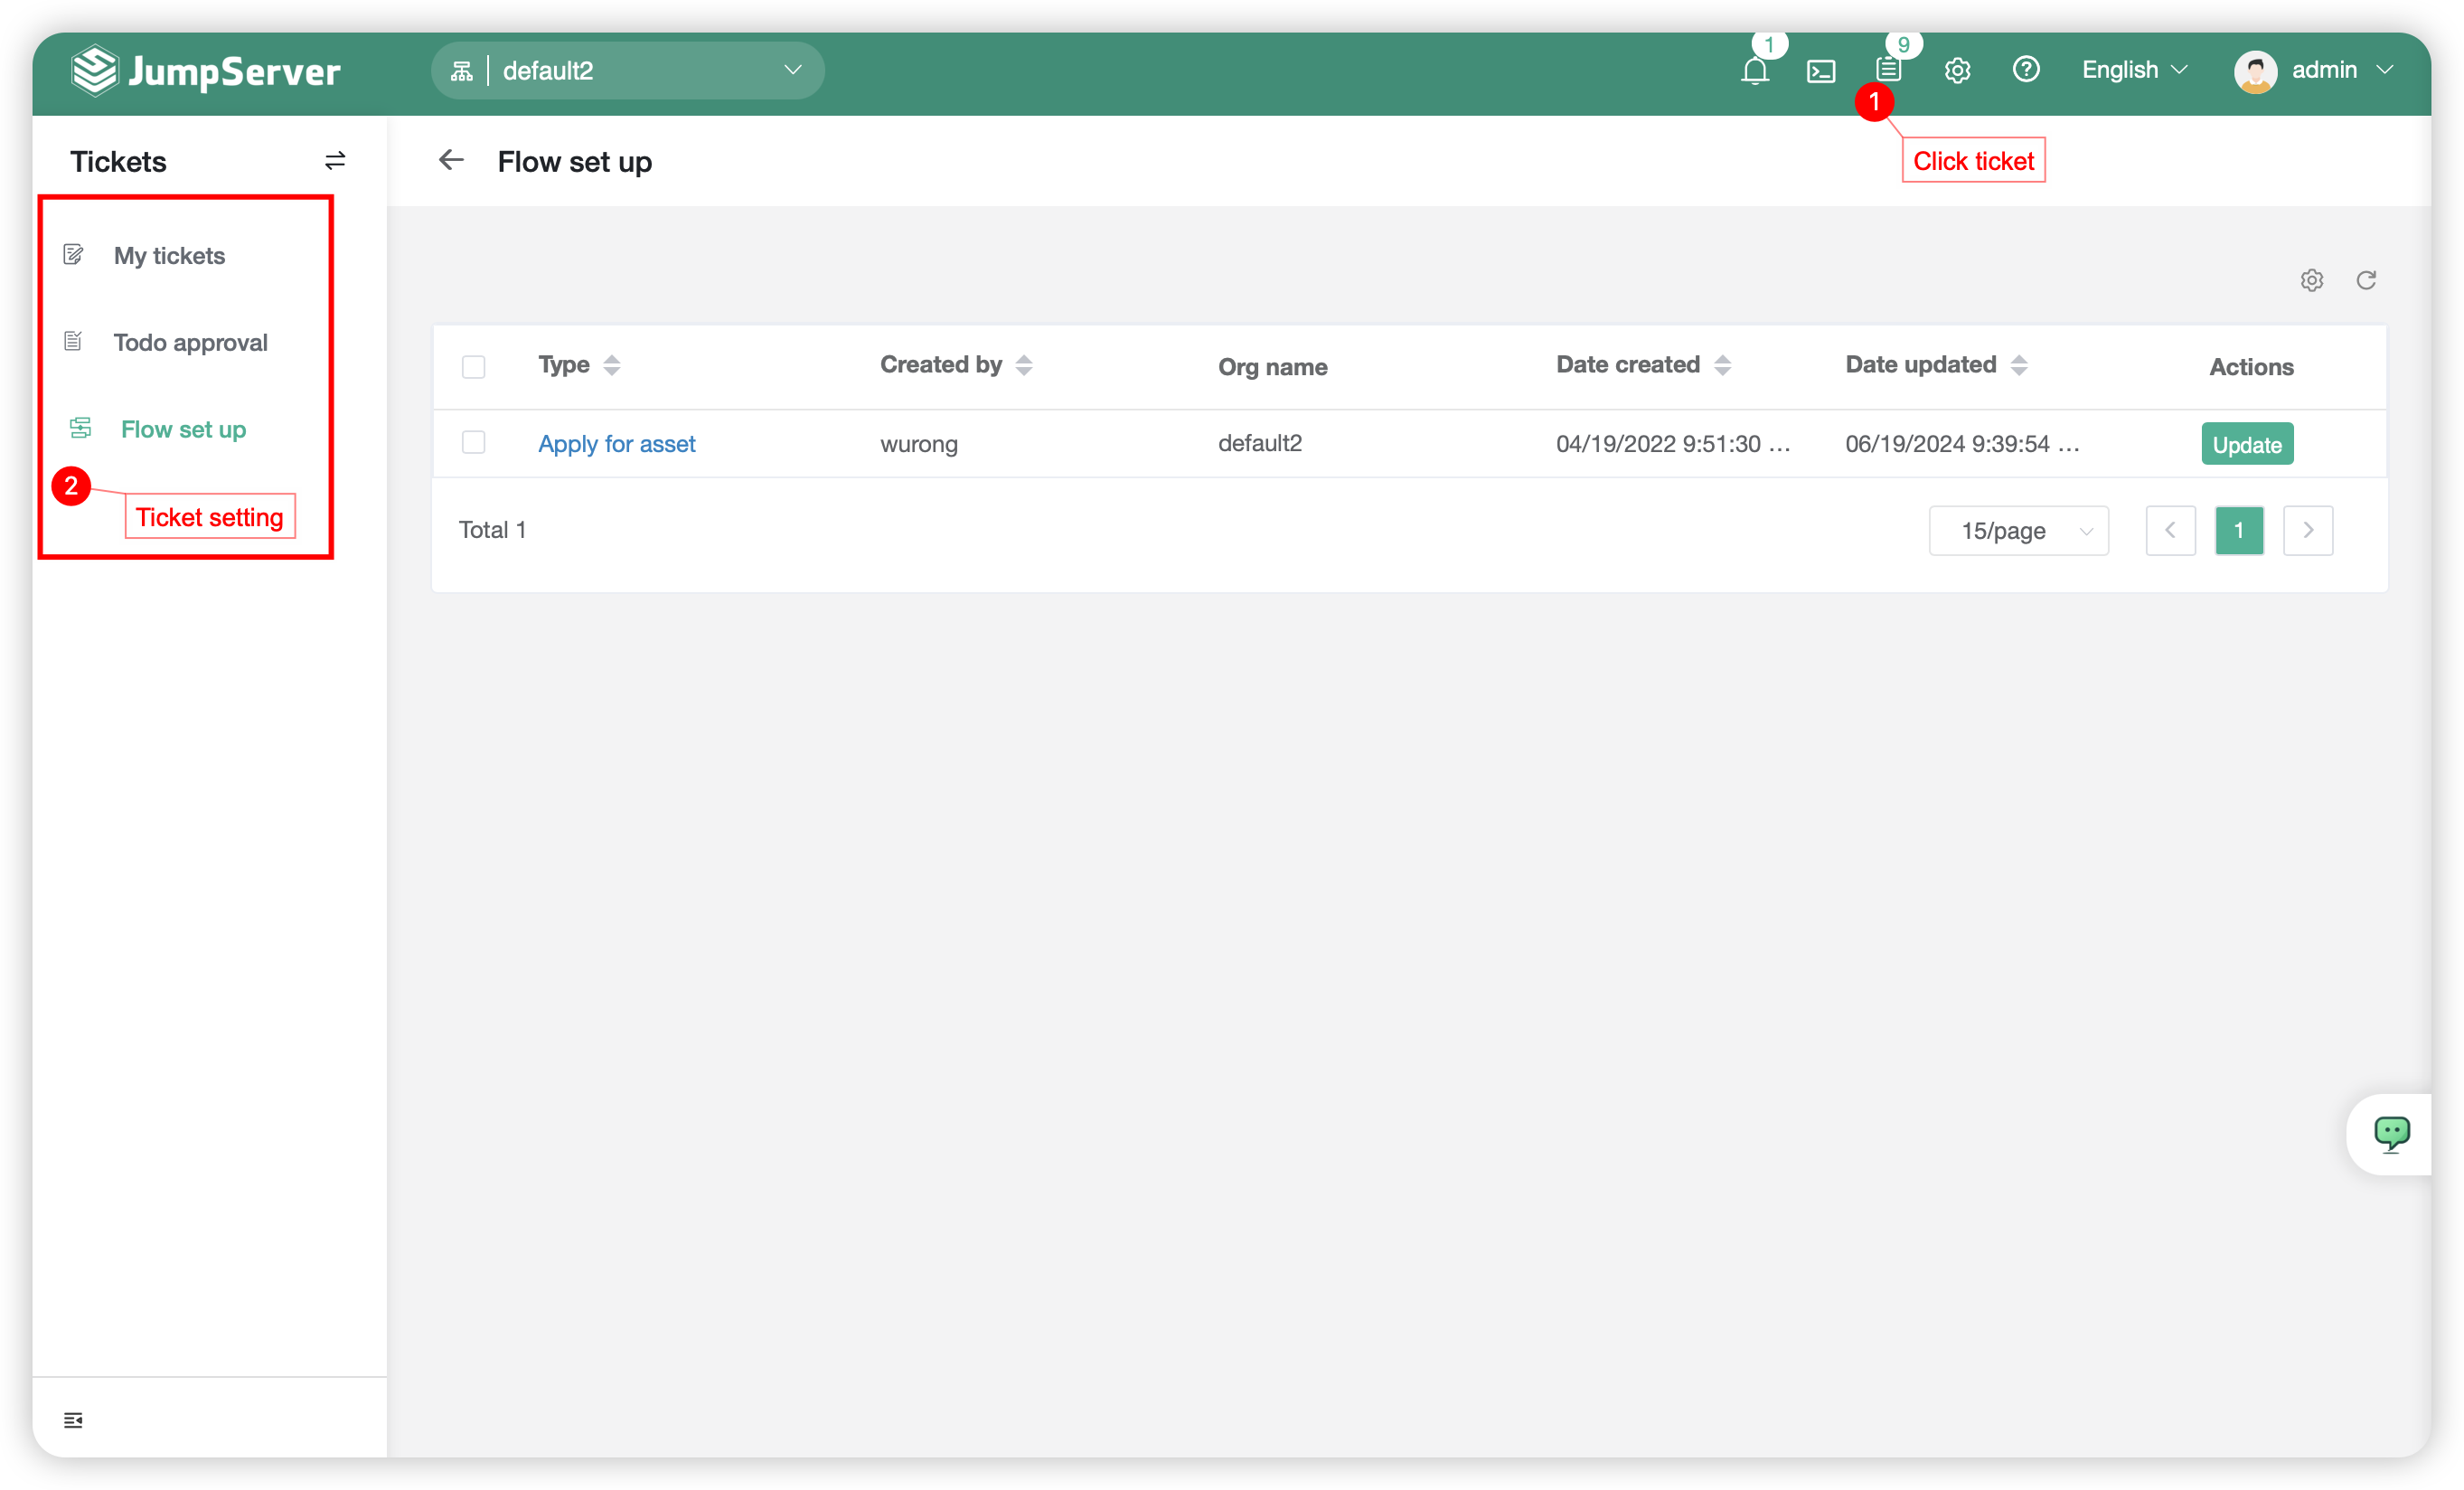
2 Ticket⚓︎
- Clicking on the
Ticketbutton at the top of the page and switch to the page of ticket settings page. - On this page, you can customize whether to enable the
Ticketfeature. Users can utilize theTicketfunctionality to request resource authorization.

- After enabling the work order feature, the work order page will appear as follows:
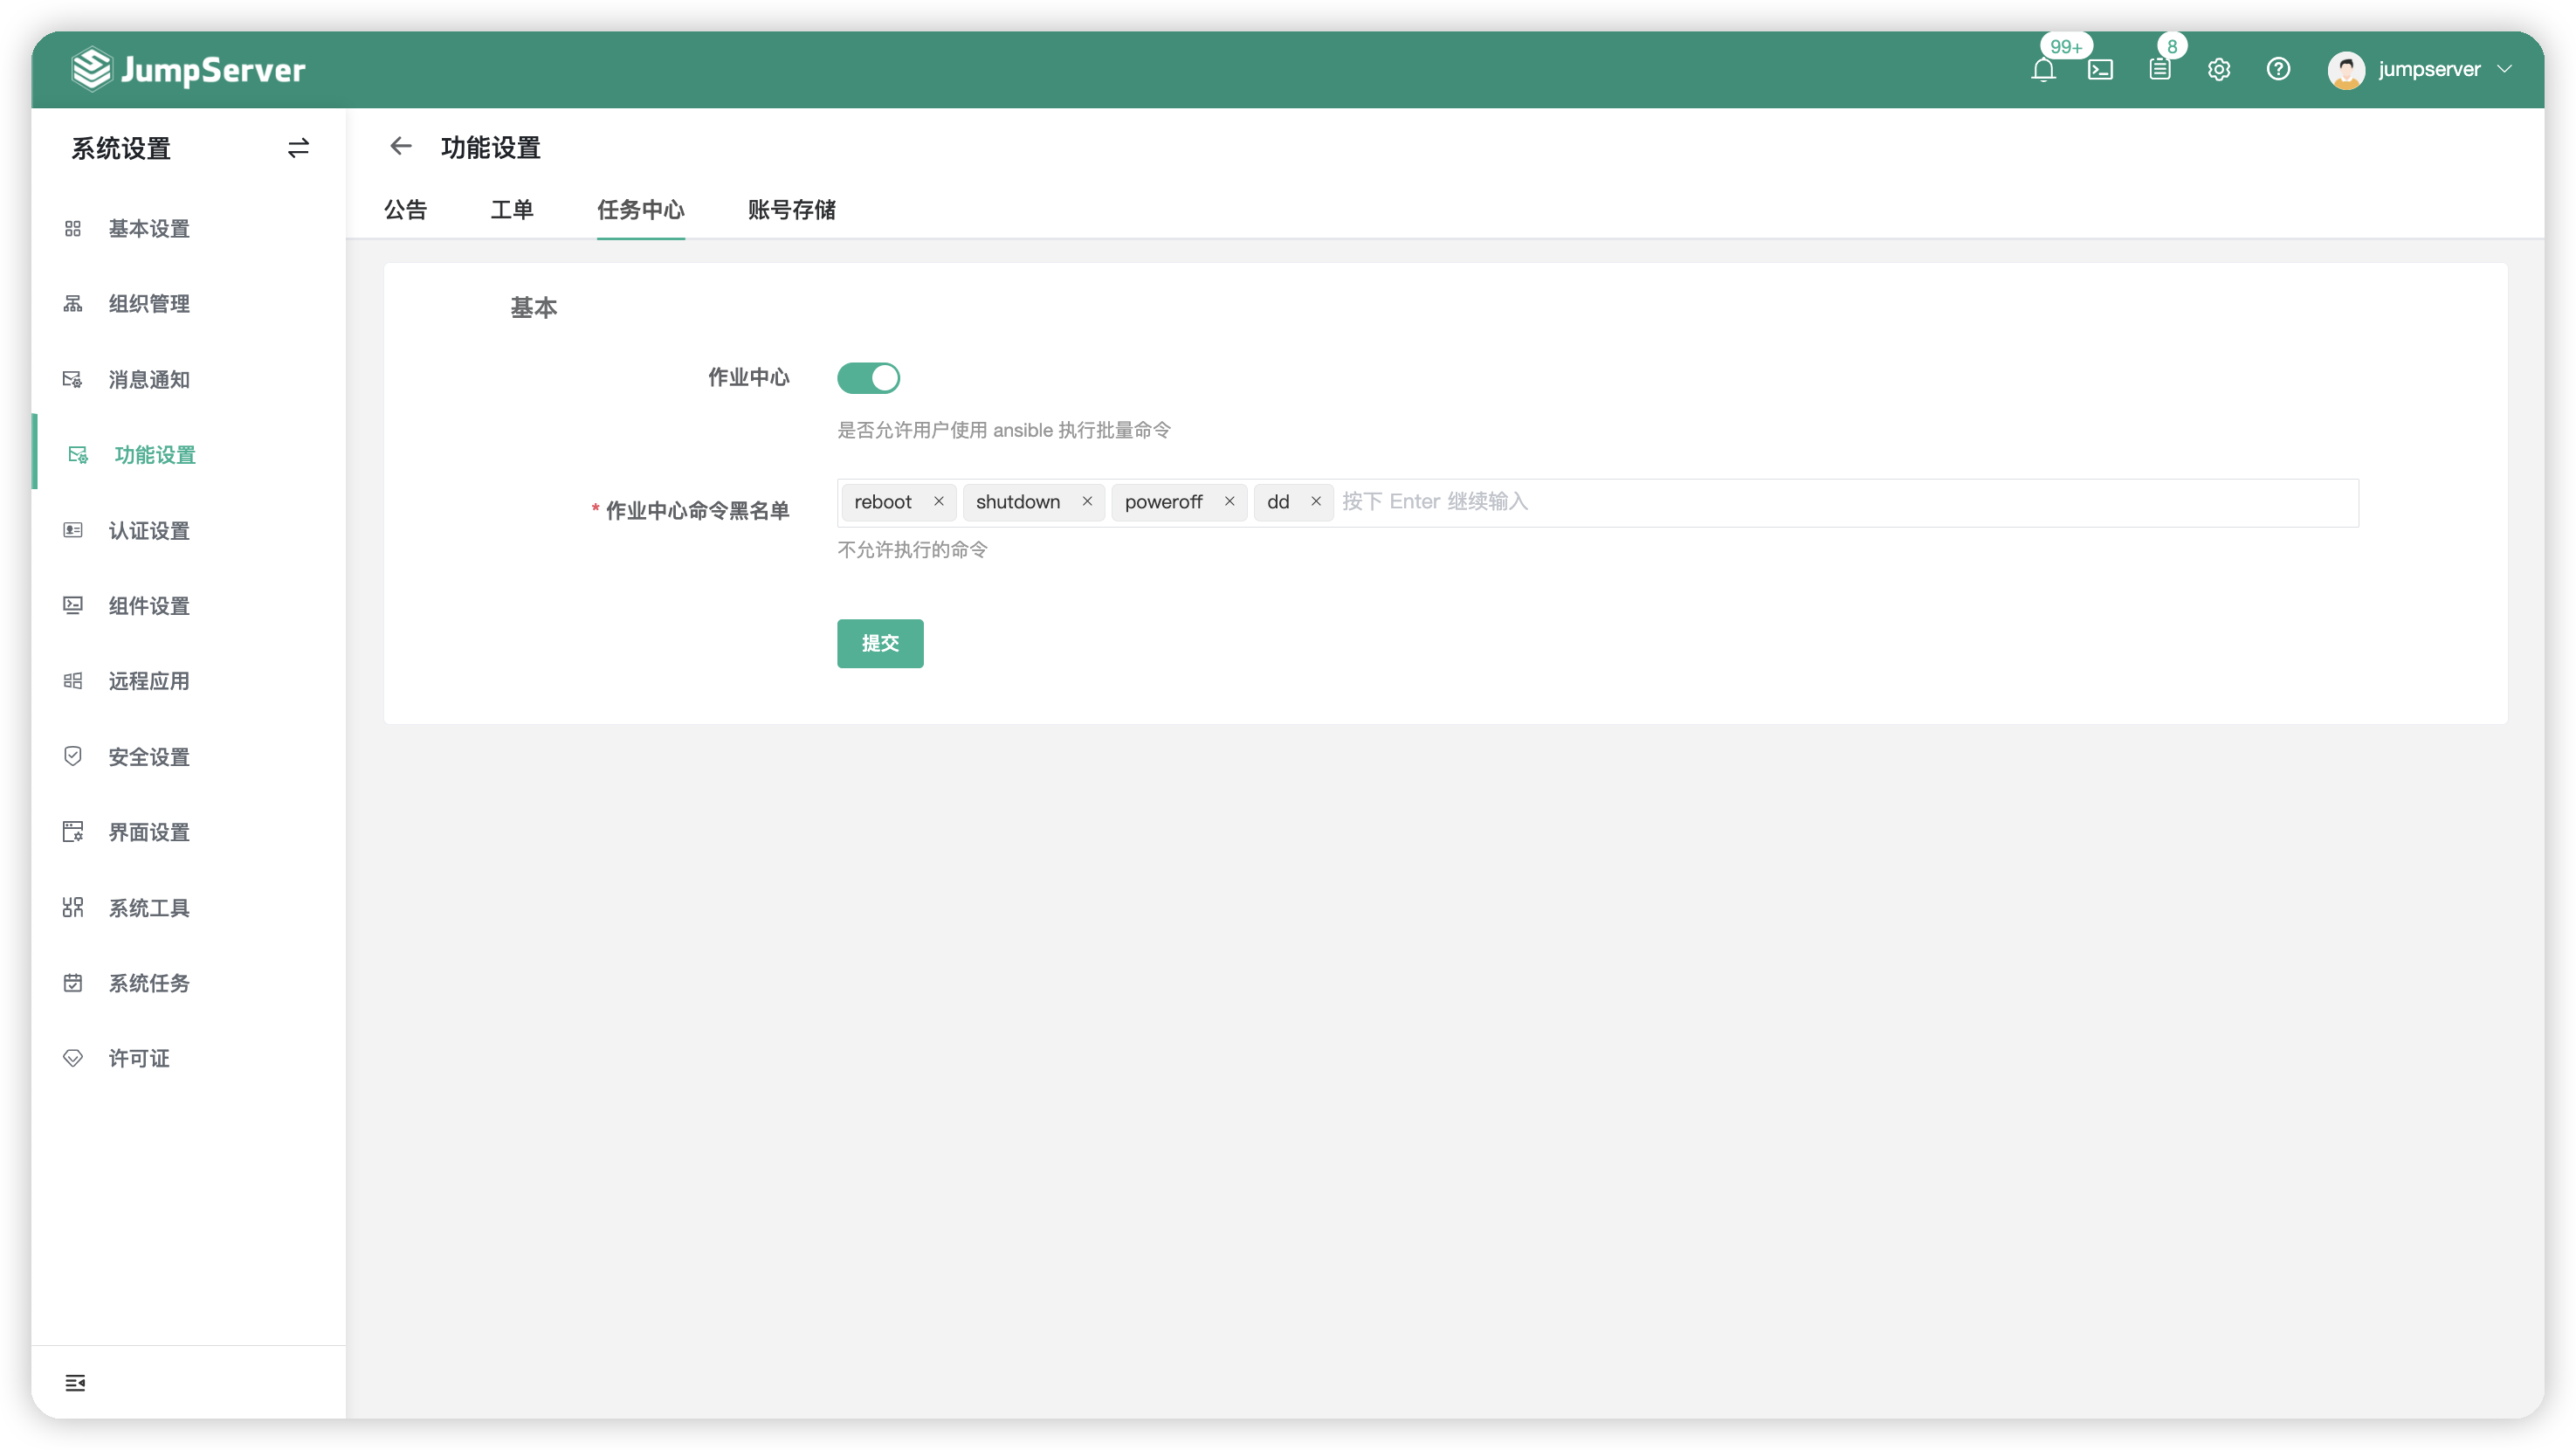
3 Task Center⚓︎
- Clicking on
Task Centerbutton at the top of the page will take you to the page of task center settings . - On this page, you can customize whether to enable the
Task Centerfeature. Additionally, you can configure theTask Center Command BlacklistUsers can use theTask Centerfunctionality to execute task operations.
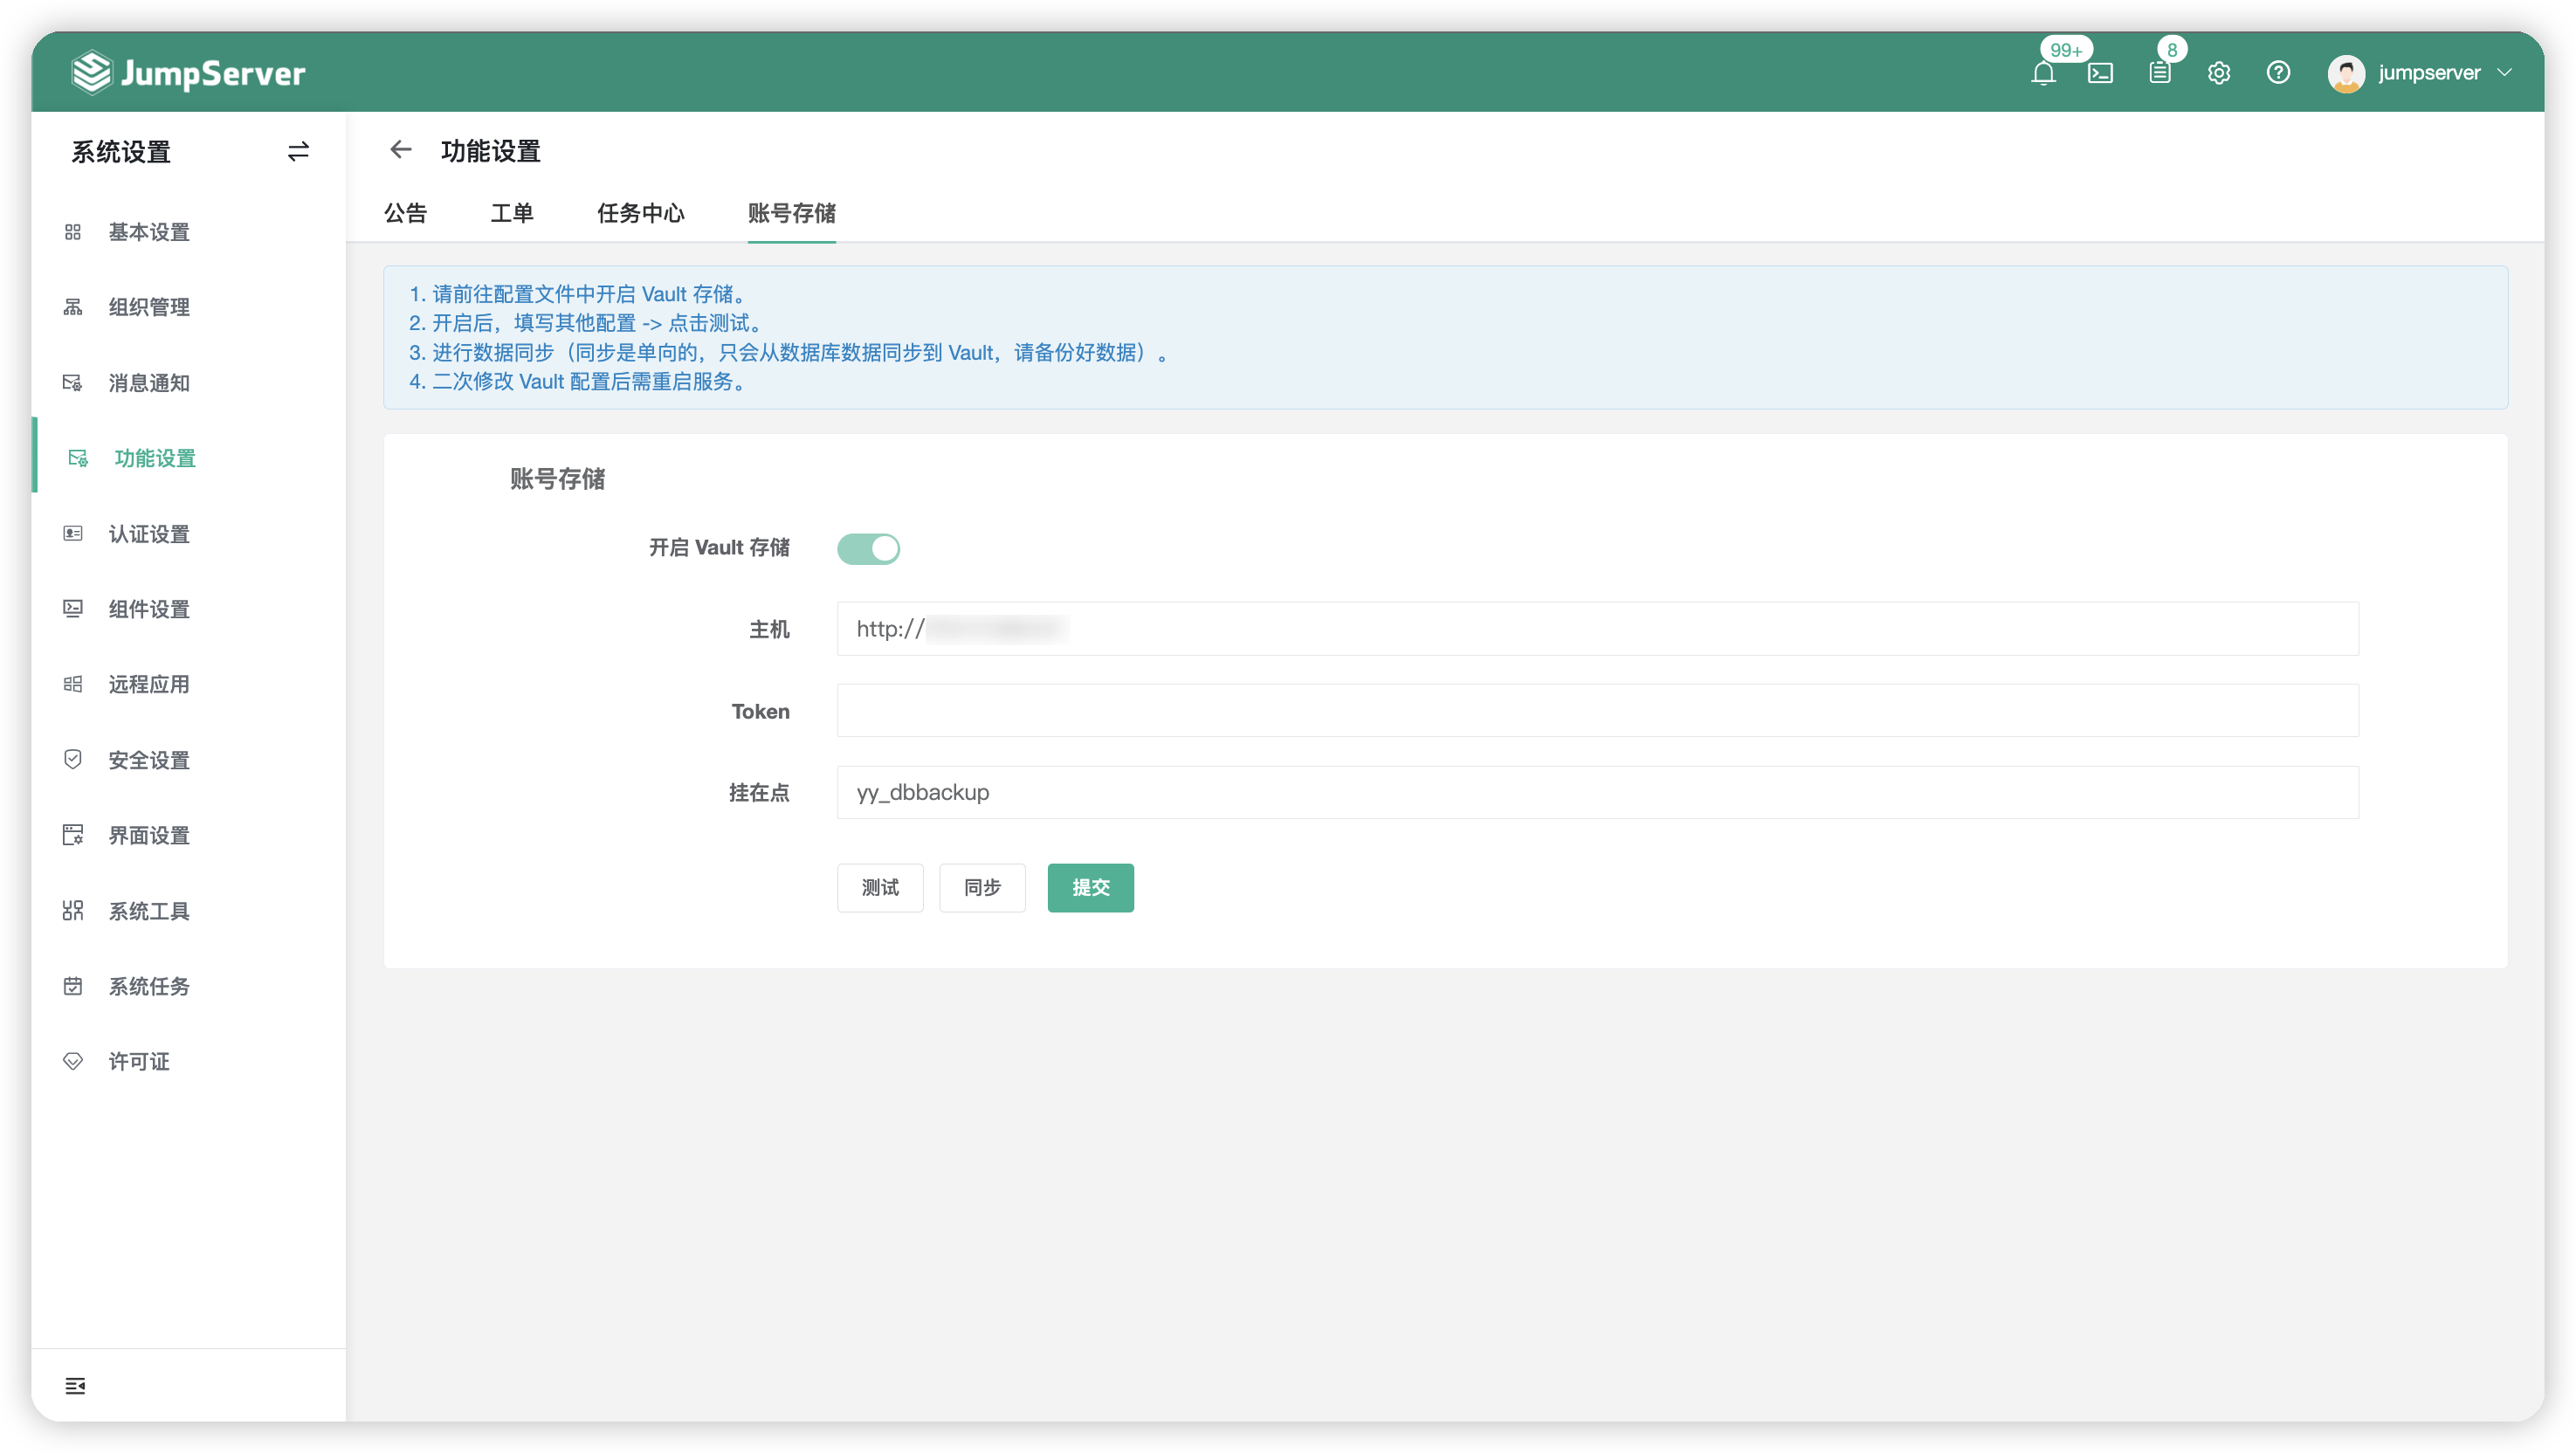
4 Account Storage(X-Pack)⚓︎
note:Account storage is a feature exclusive to JumpServer Enterprise Edition.
4.1 Configuration Instructions⚓︎
- Clicking on the
Account Storagebutton at the top of the page will take you to the account storage settings page. - On this page, account keys support integration with HashiCorp Vault as a third-party key storage system. Users need to modify the
VAULT_ENABLEDparameter in theconfig.txtconfiguration file toTrueand then return to the page to proceed with the configuration.